Posted on Leave a comment

Signs It’s Time to Replace Your Wig

Wigs are a fantastic way to enhance your appearance, protect your natural hair, and experiment with different hairstyles. Whether you wear wigs for fashion, convenience, or hair protection, it’s important to know when a wig has reached the end of its lifespan. Just like any beauty product, wigs do not last forever. Over time, wear and tear, styling, and daily use can affect their quality and appearance.

Knowing the signs that it’s time to replace your wig can help you maintain a polished look and prevent frustration from dealing with a wig that no longer performs well. In this detailed guide, we will explore the major signs that indicate it’s time to retire your wig and invest in a new one.

1. Excessive Tangling and Matting

One of the most common signs that your wig needs replacing is constant tangling. While all wigs can tangle slightly especially long ones—severe tangling that happens frequently is a warning sign.

If your wig:
. Tangles immediately after brushing
. Forms knots at the nape of the neck
. Mats easily even after washing

then the fibers or hair strands may be worn out.

For synthetic wigs, this happens because the fibers lose their smooth coating over time. For human hair wigs, repeated styling, heat, and friction can cause the hair cuticles to become damaged.

When detangling becomes a daily struggle, replacing the wig may be the best solution.

2. Shedding That Won’t Stop

A small amount of shedding is normal for wigs, especially when they are new. However, excessive shedding is a sign that the wig is deteriorating.

If you notice:
. Hair strands coming out every time you comb
. Bald spots forming on the wig cap
. The wig becoming noticeably thinner

then the wig is likely reaching the end of its lifespan.

Shedding can occur due to:
. Loose knots
. Over-brushing
. Frequent styling
. Poor-quality wig construction

Once shedding becomes severe, the wig may no longer look full or natural.

3. The Wig Looks Frizzy and Dry

Another major sign that it’s time to replace your wig is when it starts to look permanently frizzy or dry.

This usually happens when:
. The hair fibers have been overexposed to heat
. The wig has been washed too often
. Product buildup damages the strands

If deep conditioning, wig sprays, or serums no longer restore softness, the fibers may be permanently damaged.

A frizzy wig often looks dull and unnatural, which defeats the purpose of wearing it in the first place.

4. Loss of Shape and Style

Most wigs are designed to maintain a particular style whether it’s straight, curly, wavy, or layered.

Over time, wigs may:
. Lose their curl pattern
. Become flat and lifeless
. Refuse to hold styling

Synthetic wigs especially tend to lose their original shape after repeated wear.

If your wig no longer maintains its intended style even after washing and styling, it may be time for a replacement.

5. The Wig Cap Is Damaged

Sometimes the problem isn’t the hair itself but the wig cap. The cap is what keeps the wig secure and comfortable on your head.

Signs of cap damage include:
. Loose elastic bands
. Torn lace or mesh
. Stretched-out cap structure
. Clips or combs falling off

A damaged cap can make the wig uncomfortable or difficult to wear securely.

If the structure of the wig cap is compromised, replacing the wig is often the best option.

6. The Wig No Longer Fits Properly

Wigs are designed to fit snugly and comfortably. However, with frequent use, the cap may stretch out.

When this happens, you may notice:
. The wig slipping backward
. Difficulty securing the wig in place
. Constant adjustments throughout the day

A poorly fitting wig can affect both comfort and confidence.

If adjustments and straps no longer fix the issue, replacing the wig may be necessary.

7. The Color Has Faded

Color fading is another indicator that a wig may need replacing.

Over time, wigs can lose their vibrant color due to:
. Sun exposure
. Frequent washing
. Heat styling
. Chemical products

A faded wig can look dull and less attractive. While some wigs can be recolored or toned, not all fibers respond well to dye.

If the color looks washed out or uneven, replacing the wig may restore your overall look.

8. You’ve Had the Wig for a Long Time

The lifespan of a wig depends on its type and how often it is worn.

Typical wig lifespans:
. Synthetic wigs: 4–6 months with regular wear
. Heat-friendly synthetic wigs: 3–5 months
. Human hair wigs: 1–3 years with proper care

If your wig has exceeded its average lifespan and is showing signs of wear, it may be time to invest in a new one.

9. The Wig Looks Unnatural

A good wig should blend seamlessly and look natural. But as wigs age, they can start to look obvious.

Signs include:
. Visible thinning
. Unnatural shine
. Frayed ends
. Uneven density

If people can easily tell that you’re wearing a wig when they couldn’t before, it might be time to replace it.

10. Styling Your Wig Becomes Difficult

If you find yourself struggling to style your wig the way you used to, the fibers may be worn out.

You might notice that:
. The wig refuses to straighten or curl properly
. The hair becomes stiff
. Styling products stop working

This usually means the hair fibers have reached their limit.
Replacing the wig can save you time and effort.

Tips to Make Your Wig Last Longer
Before you reach the point of replacing your wig, proper care can extend its lifespan.
Some helpful tips include:

1. Wash your wig properly
Use sulfate-free shampoos and conditioners designed for wigs.

2. Store your wig correctly
Keep it on a wig stand to maintain its shape.

3. Avoid excessive heat
Too much heat can damage both synthetic and human hair wigs.

4. Use gentle brushes
Wide-tooth combs or wig brushes reduce shedding.

5. Rotate your wigs
If you have multiple wigs, switching between them reduces wear and tear.

Wigs are a valuable beauty investment, and with proper care they can last a long time. However, no wig lasts forever. Paying attention to signs like excessive tangling, shedding, frizz, cap damage, and loss of style can help you determine when it’s time to replace your wig.

Replacing an old wig with a fresh one not only improves your appearance but also restores your confidence. When your wig looks natural, comfortable, and well-styled, you can step out feeling your absolute best.

Posted on Leave a comment

The Tropical Secret: Unveiling the Benefits of Coconut Oil for Hair Health

For centuries, communities in tropical regions have sworn by the power of coconut oil, not just for cooking, but also for its incredible beauty benefits. And when it comes to hair, this fragrant, natural oil is nothing short of a miracle worker! If you’re looking to transform your tresses from dull and damaged to vibrant and healthy, it’s time to dive into the wonderful world of coconut oil.

Why Coconut Oil Reigns Supreme for Hair Health

What makes coconut oil so special? It all comes down to its unique molecular structure. Unlike many other oils, coconut oil is predominantly made up of medium-chain fatty acids, especially lauric acid. This tiny but mighty molecule has a high affinity for hair proteins and, due to its small size, can penetrate the hair shaft more effectively than other oils. This deep penetration is key to unlocking its numerous benefits.

Let’s break down exactly how coconut oil can revolutionize your hair care routine:

1. Deep Moisturization and Conditioning
Dry, brittle hair is often a result of a lack of moisture. Coconut oil acts as an exceptional natural conditioner, seeping into the hair strands and replenishing lost hydration. It helps to seal the cuticle, locking in moisture and leaving your hair feeling softer, smoother, and more pliable. Say goodbye to straw-like hair!

2. Reduces Protein Loss and Damage
Our hair is primarily made of protein, and everyday activities like washing, styling, and even brushing can lead to protein loss, weakening the hair and making it prone to breakage. Studies have shown that coconut oil can significantly reduce protein loss for both damaged and undamaged hair when used as a pre-wash or post-wash treatment. Its ability to penetrate the hair shaft prevents water from swelling the hair and pushing out protein.

3. Fights Frizz and Adds Shine
Tired of battling frizz, especially in humid weather? Coconut oil can be your secret weapon. By smoothing the hair cuticle and providing deep moisture, it helps to tame flyaways and create a sleek, polished look. The result? Hair that not only feels healthy but also boasts a beautiful, natural shine that radiates vitality.

4. Promotes Scalp Health and Fights Dandruff
A healthy scalp is the foundation for healthy hair. Coconut oil possesses natural antifungal and antibacterial properties, which can be incredibly beneficial for maintaining a clean and healthy scalp environment. It can help to soothe dryness, reduce irritation, and even combat issues like dandruff by addressing the underlying fungal causes. A gentle scalp massage with warm coconut oil can also improve blood circulation, further promoting hair growth.

5. Protects Against Heat Damage
If you frequently use heat styling tools like flat irons or curling wands, you know the damage they can inflict. Applying a thin layer of coconut oil before heat styling can provide a protective barrier, reducing the impact of high temperatures on your hair. While it’s not a complete shield, it certainly helps to minimize the stress and keep your strands healthier.

6. Aids in Hair Growth and Strength
While coconut oil doesn’t magically make your hair grow faster, its overall benefits contribute to a healthier environment for growth. By strengthening the hair shaft, reducing breakage, and maintaining a healthy scalp, it creates optimal conditions for your hair to reach its full potential in length and thickness.

How to Incorporate Coconut Oil into Your Hair Care Routine

Ready to experience the magic? Here are a few ways to use coconut oil for your hair:

• Pre-Shampoo Treatment: This is one of the most popular and effective methods. Melt a few tablespoons of virgin coconut oil and apply it generously from roots to tips. Massage into your scalp. Leave it on for at least 30 minutes, or even overnight for an intensive treatment, then shampoo and condition as usual.

• Leave-In Conditioner (in moderation): For a touch of frizz control and shine, warm a tiny amount of coconut oil between your palms and lightly apply it to the ends of your damp or dry hair. A little goes a long way here to avoid greasiness.

• Hair Mask: Mix coconut oil with other beneficial ingredients like honey, aloe vera, or an egg yolk for a customized deep conditioning mask. Apply for 30 minutes, then rinse.

• Scalp Treatment: Gently massage warm coconut oil into your scalp for 10-15 minutes before washing to improve circulation and address scalp issues.

A Word of Caution:

While coconut oil is generally safe and beneficial, everyone’s hair is different. If you have very fine hair, use it sparingly to avoid weighing it down. Always opt for virgin, unrefined coconut oil for the best results, as it retains most of its beneficial nutrients.

Posted on Leave a comment

The Benefits of Rice Water for Hair Growth

Rice water has become one of the most talked-about natural hair care remedies in recent years. From natural hair enthusiasts to beauty influencers and even professional hairstylists, many people swear by rice water as a powerful solution for hair growth, strength, and shine. While it may seem like a modern trend, rice water has actually been used for centuries in different cultures, especially in Asia, as a secret to long, healthy hair.

In this blog, we will explore what rice water is, why it works, and the many benefits it offers for hair growth and overall hair health. Whether you have natural hair, relaxed hair, braided hair, or wear wigs and extensions, understanding rice water can help you make informed decisions for your hair care routine.

What Is Rice Water?

Rice water is the starchy liquid left behind after rice has been soaked, rinsed, or cooked. This cloudy water contains nutrients that come from the rice grains, including vitamins, minerals, amino acids, and antioxidants. These nutrients are what make rice water beneficial not only for hair but also for skin.

There are different types of rice water commonly used for hair:

Soaked rice water (raw rice soaked in water)

Boiled rice water (water left after cooking rice)

Fermented rice water (rice water left to ferment for a period of time)

Each type has its own strength and benefits, but all of them can support hair growth when used correctly.

The History of Rice Water for Hair

The use of rice water dates back hundreds of years. One of the most famous examples is the Yao women of Huangluo Village in China, known for their extremely long, thick, and healthy hair often growing longer than their height. These women wash their hair with fermented rice water and attribute their hair length, shine, and delayed graying to this practice.

In Japan during the Heian period, women also used rice water, known as Yu-Su-Ru, to maintain long, glossy hair. These historical examples show that rice water is not just a beauty myth but a traditional hair care practice with proven results over time.

Nutrients in Rice Water That Promote Hair Growth

Rice water is effective because it contains several nutrients that directly benefit the hair and scalp:

1. Amino Acids

Amino acids are the building blocks of protein, and hair is made mostly of protein (keratin). Rice water helps strengthen hair strands, reduce breakage, and support new hair growth.

2. Inositol

Inositol is a carbohydrate found in rice water that penetrates damaged hair and repairs it from within. One unique benefit of inositol is that it continues to protect hair even after rinsing, helping to prevent future damage.

3. Vitamins (B, C, and E)

Vitamin B improves blood circulation to the scalp, encouraging hair growth.

Vitamin C supports collagen production, which strengthens hair.

Vitamin E acts as an antioxidant, protecting hair from environmental damage.

4. Minerals

Rice water contains minerals like magnesium and zinc that help maintain a healthy scalp and reduce hair shedding.

Benefits of Rice Water for Hair Growth

1. Promotes Faster Hair Growth

Rice water nourishes the scalp and strengthens hair roots, creating the right environment for hair to grow faster. While it doesn’t magically grow hair overnight, consistent use can support steady and healthy growth over time.

2. Strengthens Hair Strands

Weak hair breaks easily, making it difficult to retain length. Rice water strengthens the hair shaft, reduces split ends, and improves elasticity, allowing you to keep the length you grow.

3. Reduces Hair Breakage and Shedding

Thanks to its protein content, rice water helps repair damaged hair and reduce excessive shedding caused by breakage. This is especially beneficial for people with chemically treated or heat-damaged hair.

4. Improves Scalp Health

A healthy scalp is essential for hair growth. Rice water helps soothe the scalp, reduce dryness, and maintain a balanced scalp environment, which supports stronger hair follicles.

5. Adds Shine and Smoothness

One of the most noticeable effects of rice water is the shine it gives to hair. It smooths the hair cuticle, making hair appear healthier, softer, and more manageable.

6. Helps Detangle Hair

Rice water reduces friction between hair strands, making detangling easier and reducing hair loss during combing or styling.

7. Enhances Hair Texture

Regular use of rice water can improve hair texture, making hair feel fuller and thicker over time. This is particularly helpful for people with fine or thinning hair.

8. Supports Length Retention

Hair growth is not only about growing new hair but also about keeping the hair you already have. By reducing breakage and split ends, rice water helps improve length retention.

Benefits for Different Hair Types

Natural Hair

Rice water helps strengthen natural curls and coils, reducing breakage and improving curl definition when used properly.

Relaxed or Chemically Treated Hair

Relaxed hair is more prone to damage. Rice water helps rebuild protein loss and improve hair strength.

Protective Styles (Braids, Twists, Wigs)

Using rice water as a scalp spray under protective styles can nourish the scalp and support hair growth even when hair is tucked away.

Low Porosity vs High Porosity Hair

Low porosity hair should use diluted rice water to avoid protein overload.

High porosity hair can benefit greatly from rice water as it helps fill gaps in the hair shaft.

How to Use Rice Water Safely for Hair Growth

While rice water has many benefits, it should be used correctly to avoid dryness or protein overload.

Tips for safe use:

Always dilute rice water, especially fermented rice water.

Use it 1–2 times a week, not daily.

Follow up with a moisturizing conditioner or deep conditioner.

Pay attention to how your hair responds and adjust usage accordingly.

Possible Side Effects and Precautions

Although rice water is natural, overuse can cause:

Hair dryness

Protein buildup

Stiff or brittle hair

People with very sensitive scalps should do a patch test before full application.

Rice Water vs Commercial Hair Growth Products

Unlike many commercial products that contain harsh chemicals, rice water is:

Affordable

Natural

Easy to prepare at home

Free from sulfates and parabens

However, rice water works best as part of a balanced hair care routine that includes proper cleansing, moisturizing, and protective styling.

Rice water is a powerful, time-tested natural remedy that can significantly improve hair growth, strength, and overall hair health when used correctly. It is not a miracle solution, but with consistency, patience, and proper hair care practices, rice water can help you achieve longer, stronger, and healthier hair.

Whether you are starting a hair growth journey, recovering from hair damage, or simply looking to improve your hair’s appearance, rice water is a simple and effective addition to your routine.

Posted on Leave a comment

Hair Care Tips for Kids and Teens: A Complete Guide to Healthy, Happy Hair

Hair care is an important part of a child’s overall hygiene and self-confidence. From early childhood through the teenage years, hair goes through many changes influenced by age, hormones, lifestyle, and environment. Teaching proper hair care habits early helps prevent damage, promotes healthy growth, and encourages kids and teens to appreciate and care for their natural hair.

This guide explains age appropriate hair care tips for kids and teens, common mistakes to avoid, and how to build healthy hair routines that last a lifetime.

Understanding Hair Growth in Kids and Teens

Hair grows from follicles in the scalp, and its health depends on genetics, nutrition, scalp care, and daily handling.

Kids’ hair is usually finer and more delicate, making it prone to breakage.

Teen hair may become oilier, drier, or more textured due to hormonal changes during puberty.

Because of these differences, hair care routines should evolve as children grow.

Hair Care Tips for Kids (Ages 2–12)

1. Keep Hair Care Gentle and Simple

Children’s hair does not need frequent washing or heavy products. Overwashing can strip natural oils and cause dryness.

Best practices:

Wash hair every 7–10 days or when visibly dirty

Use lukewarm water

Avoid overloading hair with styling products

2. Use Mild, Child-Friendly Products

Adult shampoos and styling products can be harsh on a child’s scalp.

Look for products that are:

Sulfate-free

Alcohol-free

Tear-free

Made specifically for children

These help maintain moisture and prevent scalp irritation.

3. Detangle with Patience

Detangling is one of the most important steps in kids’ hair care.

How to detangle properly:

Detangle hair while damp, not dry

Apply a leave-in conditioner or detangling spray

Use fingers or a wide-tooth comb

Start from the ends and work upward

Never pull or rush through tangles, as this can cause pain and breakage.

4. Moisturize Regularly

Dry hair breaks easily, especially textured hair.

Moisture tips:

Moisturize 2–3 times a week

Use water-based leave-in conditioners

Seal moisture with natural oils like coconut, olive, or shea butter

5. Choose Low-Tension Hairstyles

Hairstyles should be comfortable and protective.

Good styles for kids include:

Two-strand twists

Simple braids

Cornrows (not tight)

Puff ponytails

Avoid styles that pull on the hairline or cause headaches.

6. Protect Hair at Night

Nighttime care prevents dryness and breakage.

Helpful habits:

Use satin or silk bonnets

Sleep on satin pillowcases

Loosely braid or twist hair before bed

Hair Care Tips for Teens (Ages 13–19)

Teen years introduce new challenges such as hormonal changes, peer influence, and frequent styling.

1. Establish a Healthy Wash Routine

Teens may experience dandruff or oily scalps.

Recommended routine:

Wash hair every 5–7 days

Use clarifying shampoo once a month if needed

Always condition after shampooing

2. Focus on Scalp Health

A healthy scalp supports strong hair growth.

Scalp care tips:

Massage scalp gently during washing

Avoid excessive scratching

Remove product buildup regularly

If dandruff persists, consult a dermatologist or hair professional.

3. Limit Heat Styling

Flat irons, curling irons, and blow dryers can damage hair over time.

Heat safety tips:

Use heat protectant products

Keep heat settings low

Limit heat styling to special occasions

4. Be Careful with Chemicals

Relaxers, hair dyes, and texturizers should be approached with caution.

Important guidelines:

Avoid chemicals at a young age

Always follow professional advice

Never overlap chemical treatments

Improper use can lead to hair thinning and breakage.

5. Choose Protective Styles Wisely

Protective styles help reduce manipulation when done correctly.

Healthy options include:

Knotless braids

Box braids (not too heavy)

Twists

Natural buns

Remove styles on time and give hair breaks between installations.

6. Encourage Independence and Responsibility

Teen years are ideal for teaching self-care.

Encourage teens to:

Learn their hair type

Moisturize and detangle independently

Avoid sharing combs and brushes

Speak up if a style feels too tight

Nutrition and Lifestyle for Healthy Hair

Hair health begins from within.

Key nutrients for hair growth:

Protein (eggs, fish, beans)

Iron (leafy greens, red meat)

Vitamins A, C, D, and E

Omega-3 fatty acids

Plenty of water

Regular sleep and stress management also support healthy hair growth.

Common Hair Care Mistakes to Avoid

Washing hair too often

Skipping conditioner

Using adult products on kids

Tight hairstyles

Excessive heat use

Ignoring scalp issues

Building Confidence Through Hair Care

Hair care is more than grooming; it’s a confidence-building practice. When kids and teens learn to care for their hair, they also learn patience, self-love, and pride in their appearance. This is especially important during adolescence, when self-image plays a big role in emotional well-being.

Healthy hair starts with gentle care, consistency, and age-appropriate routines. By teaching kids and teens how to properly care for their hair, parents help them build lifelong habits that promote strong, healthy hair and confidence.

Every hair type straight, wavy, curly, or coily deserves proper care and attention.

Posted on Leave a comment

‎Most Common Wig Maintenance Mistakes and How to Avoid Them

‎Wigs are a fabulous way to express your style, protect your natural hair, or simply switch things up. But whether you’re rocking synthetic strands or human hair tresses, proper maintenance is key to keeping your wig looking flawless and lasting longer. Unfortunately, many wig wearers unknowingly make mistakes that can shorten the lifespan of their investment. Let’s break down the most common wig maintenance missteps and how to fix them.

‎1. Washing Too Often (or Not Enough)

‎ The mistake: Washing your wig too frequently can strip it of its natural luster, while not washing it enough leads to product buildup, odor, and tangling.

‎ The fix: Wash synthetic wigs every 6–8 wears and human hair wigs every 10–15 wears, or when they start to look dull or feel heavy. Use lukewarm water and wig-specific shampoo and conditioner.

2. Using Heat on Synthetic Wigs

‎ The mistake: Applying curling irons, flat irons, or blow dryers to synthetic wigs that aren’t heat-resistant can cause irreversible melting or frizzing.

‎ The fix: Always check if your synthetic wig is labeled “heat-friendly.” If not, avoid heat styling altogether. For heat-safe wigs, keep tools under 350°F (175°C) and use a heat protectant spray.


‎ 3. Using Regular Hair Products

‎ The mistake: Spritzing your wig with standard hair sprays, gels, or oils can lead to residue buildup, tangling, and damage especially on synthetic fibers.

‎ The fix: Only use products formulated specifically for wigs. These are designed to be lightweight and residue-free.


‎ 4. Sleeping or Showering in Your Wig

‎ The mistake: Sleeping in your wig causes friction, matting, and breakage. Showering with it on can lead to waterlogging and tangling.

‎ The fix: Always remove your wig before bed or bathing. If you must sleep in a wig, use a silk bonnet or pillowcase and opt for a glueless, breathable unit.


‎ 5. Improper Detangling

‎ The mistake:Brushing your wig while it’s wet or using the wrong tools can cause shedding and fiber breakage.

‎ The fix: Use a wide-tooth comb or a wig brush. Start from the ends and work your way up. For curly wigs, finger detangling is often best.


‎ 6. Storing Wigs Incorrectly

‎ The mistake: Tossing your wig into a drawer or leaving it in direct sunlight can distort its shape and fade its color.

‎ The fix: Store wigs on a wig stand or mannequin head in a cool, dry place. Cover with a satin scarf or hairnet to prevent dust and tangling.

‎ 7. Skipping Deep Conditioning (for Human Hair Wigs)

‎ The mistake:Human hair wigs need moisture just like natural hair. Neglecting deep conditioning leads to dryness and brittleness.

‎ The fix: Deep condition your human hair wig every 2–3 washes. Use a sulfate-free, moisturizing conditioner and let it sit for 15–30 minutes before rinsing.

‎ 8. Wearing Dirty Wig Caps

‎ The mistake: Reusing the same wig cap without washing it can lead to scalp irritation and transfer oils and dirt to your wig.

‎ The fix: Wash your wig caps regularly ideally after every few wears. Keep a few on hand so you can rotate them.

‎ 9. Coloring Synthetic Wigs

‎ The mistake: Trying to dye a synthetic wig with regular hair dye can ruin the fibers and cause patchy, uneven color.

‎ The fix: Only dye human hair wigs. If you want to change the color of a synthetic wig, use fabric dye or alcohol-based ink sprays but proceed with caution and test a small section first.

‎ 10. Ignoring the Wig’s Instructions

The mistake: Not reading the care label or instructions that come with your wig can lead to avoidable damage.

The fix: Always check the manufacturer’s guidelines for washing, styling, and storing. Each wig is different, and what works for one may not work for another.

‎Wig maintenance doesn’t have to be complicated, but it does require consistency and care. By avoiding these common mistakes, you’ll extend the life of your wig, keep it looking stunning, and save money in the long run. Whether you’re a daily wig wearer or an occasional glam queen, treat your wig like the crown it is and it’ll serve you well.

Posted on Leave a comment

Protecting and Nourishing Your Hair In The Summer

Summer is a time for basking in the warm sun, enjoying outdoor activities, and embracing a more relaxed lifestyle. However, the hot weather, humidity, and exposure to various environmental factors can take a significant toll on your hair. From UV rays and chlorine to salt water and sweat, your locks face numerous challenges during the summer months.

To keep your hair healthy, strong, and beautiful all season long, it’s essential to adapt your hair care routine and take extra steps to protect and nourish your tresses. In this comprehensive guide, we’ll explore the best ways to shield your hair from summer damage, maintain its vitality, and promote healthy growth.

1. Understanding the Impact of Summer on Your Hair
Before diving into the specific strategies for summer hair care, it’s crucial to understand how the season can affect your locks. Some of the main culprits behind summer hair damage include:

– UV Rays: Just like your skin, your hair can suffer from sun damage. UV rays can penetrate the hair shaft, causing dryness, brittleness, and color fading.


– Humidity: High humidity levels can lead to frizz, flyaways, and an overall loss of hair structure, especially for those with naturally curly or wavy hair.

– Heat: Excessive heat from the sun or styling tools can strip your hair of its natural oils, leading to dryness, breakage, and split ends.

– Chlorine and Salt Water: Pool chemicals and ocean water can wreak havoc on your hair, causing discoloration, dryness, and damage to the hair cuticle.

2. Shielding Your Hair from the Sun
One of the most important steps in summer hair care is protecting your locks from harmful UV rays. Here are some effective strategies to minimize sun damage:

– Wear a Hat or Scarf: Covering your hair with a wide-brimmed hat, a lightweight scarf, or a bandana can help block out direct sunlight and prevent UV damage.


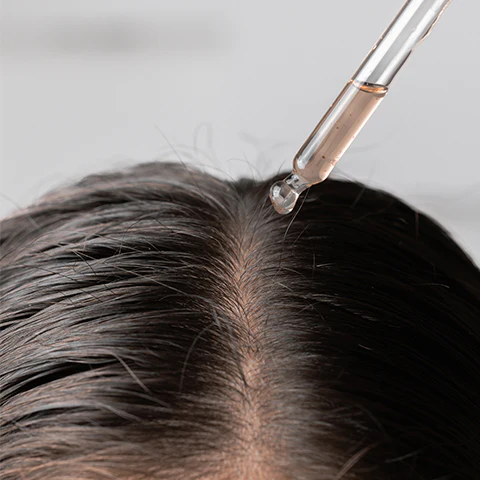
– Use UV-Protective Hair Products: Look for leave-in conditioners, serums, or sprays that contain UV filters. These products create a barrier on the hair shaft, shielding it from the sun’s rays.


– Avoid Peak Sun Hours: Try to stay out of the sun during the hottest part of the day, typically between 10 a.m. and 4 p.m. If you must be outdoors during these hours, seek shade whenever possible.

– Apply Sunscreen to Your Scalp: Don’t forget to protect your scalp from sun damage. Apply a lightweight, non-greasy sunscreen or a specially formulated scalp sunscreen to your part and any exposed areas of your scalp.


3. Managing Moisture Levels and Combating Frizz
Summer humidity can wreak havoc on your hair, leading to frizz, unruly textures, and an overall loss of manageability. To keep your hair hydrated and frizz-free:

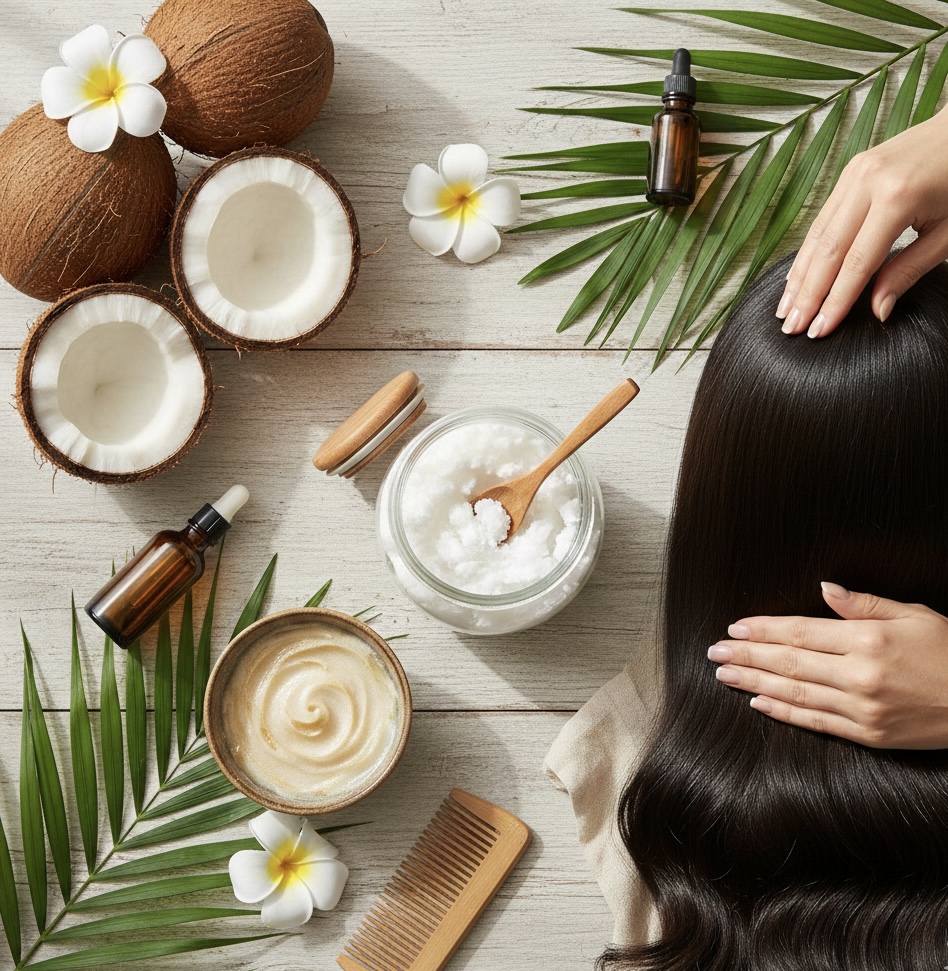
– Use a Moisturizing Shampoo and Conditioner: Look for products that contain nourishing ingredients like coconut oil, shea butter, argan oil, or aloe vera to help replenish moisture and smooth the hair cuticle.

– Deep Condition Regularly: Treat your hair to a deep conditioning mask once a week to help restore hydration, strength, and elasticity. Look for masks that contain hydrating ingredients like avocado, honey, or banana.

– Embrace Leave-In Conditioners: Apply a lightweight leave-in conditioner to damp hair to help lock in moisture, detangle knots, and combat frizz throughout the day. Look for products that contain glycerin, panthenol, or natural oils.

– Use Anti-Frizz Serums or Creams: For an extra layer of frizz control, apply a small amount of an anti-frizz serum or cream to your hair, focusing on the ends and any particularly unruly areas.

– Avoid Over-Washing: Washing your hair too frequently can strip it of its natural oils, leading to dryness and frizz. Aim to wash your hair every 2-3 days, or as needed based on your hair type and activity level.

4. Protecting Your Hair from Pool Chemicals and Salt Water
Chlorine, salt water, and other pool chemicals can cause significant damage to your hair, leading to dryness, discoloration, and breakage. To minimize the impact of these harsh substances:

– Wet Your Hair Before Swimming: Saturate your hair with clean water before entering the pool or ocean. This will help minimize the amount of chlorine or salt water your hair absorbs.

– Apply a Protective Oil or Product: Coat your hair with a light layer of coconut oil, olive oil, or a specialized pre-swim hair product. This creates a barrier on the hair shaft, preventing chlorine and salt water from penetrating the cuticle.

– Wear a Swim Cap: If you’re a frequent swimmer or spend a lot of time in the pool, consider wearing a swim cap to minimize your hair’s exposure to harsh chemicals.

– Rinse Your Hair Immediately After Swimming: As soon as you exit the pool or ocean, rinse your hair thoroughly with clean water to remove any chlorine, salt, or debris.

– Use a Clarifying Shampoo: Once a week, or as needed, use a clarifying shampoo to remove any buildup of chlorine, salt, or styling products from your hair. Be sure to follow up with a deep conditioning treatment to restore moisture.

5. Gentle Styling Techniques for Summer
Summer activities and heat can lead to more frequent styling, but it’s essential to be gentle with your hair to prevent damage and breakage. Here are some tips for summer styling:

– Air Dry When Possible: Give your hair a break from heat styling tools and let it air dry whenever you can. If you must use a blow dryer, use the lowest heat setting and keep the dryer at least 6 inches away from your hair.

– Use Heat Protectants: When using heat styling tools, always apply a heat protectant product first to minimize damage. Look for products that contain silicones, which create a protective barrier on the hair shaft.

– Opt for Loose, Easy Hairstyles: Tight ponytails, buns, and braids can put stress on your hair, leading to breakage and damage. Instead, opt for loose, easy styles like soft braids, beachy waves, or messy updos.

– Embrace Your Natural Texture: Summer is the perfect time to embrace your hair’s natural texture. Whether you have straight, wavy, or curly hair, work with your natural pattern to create effortless, heat-free styles.

– Protect Your Hair While You Sleep: To prevent tangles and frizz, sleep on a silk or satin pillowcase, or tie your hair up in a loose, high bun using a soft scrunchie.

6. Nourishing Your Hair from the Inside Out
In addition to external care, the health of your hair also depends on your overall diet and hydration levels. To promote strong, healthy hair growth from the inside out:

– Eat a Balanced, Nutrient-Rich Diet: Ensure your diet includes plenty of protein, healthy fats, and vitamins A, C, and E to support hair growth and strength. Good sources include lean meats, fish, eggs, nuts, seeds, and colorful fruits and vegetables.

– Stay Hydrated: Drink plenty of water throughout the day to help keep your body and hair hydrated from within. Aim for at least 8 glasses of water per day, and more if you’re spending time outdoors or exercising.

– Consider Supplements: If you’re not getting enough nutrients from your diet, talk to your doctor about taking a hair-friendly supplement like biotin, vitamin D, or omega-3 fatty acids.

– Manage Stress Levels: High levels of stress can contribute to hair loss and damage. Practice stress-reduction techniques like meditation, deep breathing, or yoga to help keep your stress levels in check.

7. Regular Trims and Treatments for Optimal Hair Health
To keep your hair looking and feeling its best all summer long, don’t forget to schedule regular trims and treatments:

– Get Regular Trims: Trimming your hair every 6-8 weeks can help prevent split ends, maintain healthy growth, and keep your style looking fresh.

– Indulge in Salon Treatments: Treat your hair to a nourishing salon treatment, like a deep conditioning mask, a hot oil treatment, or a scalp massage. These treatments can help revitalize your locks and promote healthy growth.

– Address Any Damage Promptly: If you notice signs of damage, such as excessive dryness, breakage, or split ends, consult with your stylist to develop a plan to help restore your hair’s health. This may include more frequent trims, targeted treatments, or changes to your daily care routine.

Protecting and nourishing your hair during the summer months requires a multi-faceted approach that includes the right products, gentle techniques, and a healthy lifestyle. By following these essential tips and tailoring your routine to your hair’s unique needs, you can keep your locks looking radiant, strong, and healthy all season long.

Remember, everyone’s hair is different, so it may take some experimentation to find the perfect summer hair care routine for you. Pay attention to how your hair responds to different products and techniques, and don’t hesitate to seek advice from your stylist if you need help achieving your hair goals.

With a little extra care and attention, you can embrace the summer season with confidence, knowing that your hair is protected, nourished, and ready to shine. So go ahead and enjoy the sun, sand, and surf – your locks will thank you for it.

Posted on Leave a comment

The Battle of the Tresses: Professional Hair Treatments vs. At-Home Remedies

When it comes to keeping your locks looking luscious, you generally have two options: professional salon treatments or DIY at-home remedies. Both can help improve hair health and appearance, but there are some clear advantages to investing in pro services. Let’s take a closer look at the key benefits of relying on the experts.

Expertise You Can’t Replicate at Home One of the biggest advantages of professional hair treatments is quite simply the expertise involved. Salon stylists and technicians undergo extensive training to master skills like:

Analyzing Hair Type and Condition From dry and brittle to oily and limp, different hair types and textures require different treatment approaches. Stylists can evaluate your hair’s porosity, elasticity, density and more to determine which salon services would be most beneficial.

Proper Product and Treatment Application
Things like glosses, smoothing treatments, and restorative hair masks require precise applications and techniques to reap the full benefits. Professionals know exactly how much product to use, how to fully saturate strands, and which areas need extra attention.

Customizing Treatments
Rather than taking a one-size-fits-all approach, salon experts can customize treatments by blending different product combinations and adjusting concentrations based on your hair’s unique characteristics and desired results.

At home, it’s easy to unknowingly skip sections, over-apply product in some areas, experience uneven saturation or heat exposure, and misjudge what your hair really needs. Without professional training, at-home treatments are more hit-or-miss.

Superior Salon-Exclusive Products
Another major benefit of professional hair treatments? Access to industry-quality products not available to the general public. Professional salon brands like Aveda, Redken, Shu Uemura, and Oribe offer elite haircare lines utilizing:

Highly Concentrated, Potent Formulas
Unlike most drugstore brands formulated for the masses, professional haircare is optimized to deliver maximum repair, hydration, and nourishment. The formulas contain higher percentages of proven active ingredients.

Rare Exotic Botanical Extracts
Many salon hair treatments feature exotic, sustainably harvested botanical extracts from things like meadowfoam seed, pracaxi oils, and species of algae, delivering superior conditioning and antioxidant benefits.

Advanced Repair Technologies
Thanks to innovations like bio-ceramics, keratin capsules, and amino acid derivatives, salon-grade haircare can deeply penetrate the cuticle to rebuild and fortify strands from the inside-out.

At home, you’re limited to lower concentration over-the-counter products that treat hair more superficially with silicones and waxes coating the surface rather than restoring it comprehensively.

Services Tailored for Your Hair’s Needs
Beyond just top-notch products, salon visits provide completely customized hair treatment services based on your individual texture, density, damage levels, problem areas, and desired results. For instance:

Thick, Coarse Hair
May benefit from nourishing coconut oil masks, hydrating steamed treatments, and amino acid-rich smoothers and straighteners tailored for coarser textures.

Fine, Limp Hair
Could use volumizing blowouts, root lifters, and fillers containing cellulose and polymers to add grit and grip to silky strands.

Dry, Damaged Hair
Deep conditioning with fatty acid-rich butters and oils, reparative keratin treatments, porosity fillers, and protective gloss top coats are ideal.

Color-Treated Hair
Antioxidant glosses, demi-permanent color refreshers, and low pH chelating shampoos help extend vibrancy and prevent premature fade and brass.

This level of hyper-personalized treatment simply can’t be matched with typical rinse-out or leave-in at-home masks and DIY concoctions. The salon stylists are highly trained to identify hair needs and select the appropriate services.

A Spa-Worthy Experience
Of course, there’s also the sheer pampering element of reclining in a plush salon chair and letting professionals work their magic. Many salon treatments incorporate relaxing add-ons like:

Scalp Massages
To improve circulation and relieve tension, massages also help detangle locks while allowing treatment products to better reach follicles.

Steam Therapy
Generated by steaming towels or specialized machines, intense humid heat hydrates and helps products more deeply penetrate the hair shaft.

Hot Oil Treatments
Delivering intense nourishment and elasticity, hot oil applications involve wrapping hair in a warming cap for deeper conditioning absorption.

High-Tech Tools
Advanced salon tools like infrared heat lamps, negative ion hair dryers, and keratin-infusing flatirons help optimize treatment performance.

Rather than straining to evenly apply treatments yourself at home while bent over the tub, you can simply kick back and be enveloped in hair-rejuvenating bliss.

Long-Lasting, Transformative Results
Due to the superior formulas, meticulous application methods, and customized technologies, the results from salon hair treatments tend to both look better and last longer than typical at-home versions. You’ll likely see benefits like:

Revived Body and Movement
Silky but full of spring and volume rather than limp, lank, or frizzy.

Touchable Softness and Shine
Smooth, glossy, and luminous without strippingaway moisture.

Manageability and Curl/Sleek Definition
Curls look bouncy and defined, straight styles lay sleek and smooth.

Extended Vibrancy of Color Treatments
Pigments look truer and more radiant for longer stretches.

Essentially, professional salon treatments can comprehensively restore hair’s health and appearance in ways basic conditioning masks and quick DIY fixes simply cannot. The results create a transformative “wow” factor you can’t really duplicate at home.

The Investment Is Worth It
To be sure, salon visits and professional hair treatments do require a bigger investment than basic box dye jobs or drugstore conditioners. However, by splurging on the expertise of trained stylists and the performance of elite haircare products, you’ll reap far better, longer-lasting results than any at-home option. Your customized transformations will leave you looking like you just stepped out of the editorial pages.

So while DIY haircare treatments can provide some benefits in a pinch, there’s simply no replacement for professional salon services if your goal is maximum hair rejuvenation and red carpet-worthy locks. It’s the ultimate indulgence your strands deserve.

Posted on Leave a comment

Seasonal Wig Care Tips: A Comprehensive Guide to Maintaining Your Wigs in Every Weather Condition

Wigs have become an integral part of many people’s lives, serving various purposes from fashion statements to medical necessities. Whether you’re a long-time wig wearer or new to the world of alternative hair, understanding how to care for your wigs throughout the changing seasons is crucial for maintaining their quality, appearance, and longevity. Each season brings unique challenges that can affect your wig’s performance and aesthetic appeal. In this comprehensive guide, we’ll delve deep into the intricacies of wig care across all four seasons, providing you with expert tips, tricks, and recommendations to ensure your wigs look their best year-round.


Spring: Embracing Renewal and Combating Humidity

As nature awakens from its winter slumber, spring brings a sense of renewal – but also increased humidity and unpredictable weather patterns. Here’s how to keep your wigs looking fresh and fabulous during this season of growth:

1. Invest in a High-Quality Wig Stand
A proper wig stand is not just a storage solution; it’s a vital tool for maintaining your wig’s shape and allowing air circulation. In spring, when humidity levels start to rise, air flow becomes even more critical to prevent moisture buildup and potential mildew growth.

– Choose a stand with a wide base for stability
– Opt for stands made of breathable materials like canvas or mesh
– Consider a collapsible stand for travel during spring vacations

2. Master Humidity Control
Spring’s increasing humidity can wreak havoc on both synthetic and human hair wigs, causing frizz and loss of style. Combat these effects with these techniques:

– Use a leave-in conditioner specifically formulated for wigs
– Apply anti-humidity sprays designed for your wig type
– Experiment with texturizing products to embrace and control natural-looking volume

3. Embrace Protective Styling
On particularly humid days, consider styling your wig in ways that minimize exposure to moisture:

– Try elegant updos like chignons or braided styles
– Experiment with half-up, half-down looks to control the most susceptible parts of the wig
– Use wig-safe accessories like decorative clips or headbands to keep styles in place

4. Implement a Spring Cleaning Routine
With increased outdoor activities and temperature fluctuations, your wig may require more frequent cleaning:

– Wash human hair wigs every 7-10 wears, or when they begin to feel heavy or look dull
– Clean synthetic wigs every 4-6 wears, or after exposure to strong odors or pollutants
– Use cool to lukewarm water and specialized wig shampoos and conditioners
– Allow wigs to air dry completely before styling or storing

5. Prepare for April Showers
Spring rain can catch you off guard, potentially damaging your wig. Stay prepared with these tips:

– Carry a compact, foldable umbrella in your bag at all times
– Invest in a stylish rain hat or water-resistant hood
– If your wig does get wet, gently blot (don’t rub) with a microfiber towel and allow it to air dry on a wig stand

Summer: Beating the Heat and Preserving Your Wig’s Vitality

Summer presents a unique set of challenges for wig wearers, from scorching temperatures to increased sun exposure and water activities. Here’s how to keep your wig – and yourself – cool and comfortable during the hottest months:

1. Choose Summer-Friendly Wig Styles
Opt for wig styles that are more manageable in hot weather:

– Short to medium-length cuts that keep your neck cool
– Wigs with less volume to reduce heat retention
– Styles with built-in parts or lace fronts for a more breathable fit
– Lighter colors that reflect sunlight and heat (but be cautious of potential fading)

2. Protect Against UV Damage
Sun exposure can fade and damage wig fibers, especially in color-treated human hair wigs:

– Apply a UV protectant spray designed for wigs before sun exposure
– Wear wide-brimmed hats or use parasols for added protection
– Store wigs away from direct sunlight when not in use
– Consider purchasing a designated “summer wig” in a slightly lighter shade to account for natural sun-lightening effects

3. Master Summer Wig Hygiene
Increased sweating and outdoor activities mean your wig may need extra attention:

– Use wig caps made from moisture-wicking materials like bamboo or microfiber
– Change your wig cap daily, or more frequently during intense heat
– Wash your wig more often – every 5-7 wears for human hair, 3-5 wears for synthetic
– Use a clarifying shampoo once a month to remove product buildup and sweat residue

4. Navigate Water Activities
Summer often involves pools, beaches, and water parks. Here’s how to protect your wig:

– Consider purchasing a designated swim wig or water-friendly synthetic wig
– If wearing your regular wig, apply a leave-in conditioner before swimming to create a protective barrier
– Rinse your wig thoroughly with cool, clean water immediately after exposure to chlorine or saltwater
– Use a deep conditioning treatment after swimming to restore moisture

5. Combat Frizz and Flyaways
Heat and humidity can cause frizz in both human hair and synthetic wigs:

– Use a wig-safe anti-frizz serum, focusing on the ends and any problem areas
– Try a light-hold hairspray to tame flyaways
– Consider having your human hair wig professionally treated with a keratin smoothing treatment

6. Embrace Alternative Cooling Methods
Stay comfortable without compromising your look:

– Use cooling sprays or mists designed for scalp relief under wigs
– Freeze your wig cap for a few minutes before wearing for a refreshing sensation
– Experiment with wig grips or cap liners that provide an extra barrier between your scalp and the wig

Fall: Transitioning to Cooler Weather with Grace

As summer fades into fall, the changing weather requires adjustments to your wig care routine. Here’s how to keep your wigs looking fabulous as the leaves change color:

1. Combat Dryness
The drop in humidity can lead to dryness in both human hair and synthetic wigs:

– Incorporate weekly deep conditioning treatments for human hair wigs
– Use leave-in conditioners and wig-safe oils to maintain moisture
– Consider using a humidifier in your home to prevent excessive drying

2. Address Static Electricity
As the air becomes drier, static can become a major issue:

– Use wig-safe anti-static sprays before styling
– Lightly run a dryer sheet over your wig to reduce static cling
– Invest in wooden or natural bristle brushes, which are less likely to create static than plastic ones

3. Protect Against Wind Damage
Fall breezes can quickly tangle and matt your wig:

– Style your wig in wind-resistant looks like low buns or braids on blustery days
– Use stylish scarves or hats to keep your wig secure in strong winds
– Carry a small wig brush or comb for quick touch-ups throughout the day

4. Adjust Your Color Palette
Fall is the perfect time to experiment with richer, warmer hair colors:

– Consider adding lowlights or transitioning to deeper shades
– Try ombré or balayage effects that blend summer lightness with autumnal tones
– Use color-depositing conditioners to refresh and deepen your wig’s hue

5. Prepare for Temperature Fluctuations
Fall often brings unpredictable weather patterns:

– Layer your outfits to avoid overheating, which can cause excessive sweating under your wig
– Allow your wig to adjust gradually when moving between outdoor cold and indoor heat
– Consider alternating between lighter and heavier wigs depending on the day’s forecast

Winter: Combating Cold, Dryness, and Static

Winter can be the harshest season for wigs, with cold temperatures, dry air, and static electricity posing significant challenges. Here’s how to protect your wigs during the frosty months:

1. Moisturize, Moisturize, Moisturize
Combating winter dryness is crucial for maintaining wig health:

– Use leave-in conditioners and wig-safe oils more frequently
– For human hair wigs, consider overnight deep conditioning treatments
– Invest in a good quality humidifier for your home and office

2. Master Static Control
Static electricity can be a constant battle in winter:

– Use fabric softener sheets to gently remove static (rub lightly over the wig)
– Invest in anti-static wig sprays and apply before going outdoors
– Consider using ionic brushes, which can help reduce static buildup

3. Protect Against Harsh Weather
Winter elements can be particularly damaging to wigs:

– Wear hats, beanies, or earmuffs over your wig in extreme cold
– Choose hat liners made of silk or satin to reduce friction
– If your wig gets wet from snow, gently blot with a towel and allow to air dry completely

4. Adjust Your Washing Routine
Over-washing can strip essential moisture from your wig in winter:

– Extend the time between washes by using dry shampoo
– When washing, use lukewarm (not hot) water to prevent further drying
– Always use sulfate-free, moisturizing shampoos and conditioners

5. Embrace Winter-Friendly Styles
Certain styles can help protect your wig and keep you warm:

– Try fuller, more voluminous styles that provide insulation
– Experiment with braided styles that are less prone to tangling in winter winds
– Consider purchasing a slightly darker wig for winter to complement the season and hide any fading

6. Care for Your Scalp
A healthy scalp means a better foundation for your wig:

– Use moisturizing scalp treatments to combat dryness and flaking
– Consider silk or satin wig caps to reduce friction and retain moisture
– Take breaks from wig-wearing when possible to allow your scalp to breathe

Year-Round Wig Care Essentials

Regardless of the season, some wig care practices remain constant:

1. Proper Brushing and Detangling
– Always use a wide-tooth comb or specialized wig brush
– Start detangling from the ends, working your way up to the roots
– Be extra gentle with wet wigs, as they are more prone to damage

2. Rotation and Rest
– If possible, alternate between multiple wigs to extend their lifespan
– Allow each wig at least 24 hours of “rest” between wears
– Use this time to reshape and air out your wigs on proper stands

3. Professional Maintenance
– Have human hair wigs trimmed every 6-8 weeks to prevent split ends
– Consider professional color touch-ups or treatments every 3-4 months
– Have synthetic wigs professionally steamed or reset when they lose their style

4. Proper Storage
– Store wigs on stands or in boxes away from direct sunlight and heat sources
– Use breathable storage options to prevent moisture buildup
– Consider using silica gel packets in storage areas to absorb excess moisture

5. Quality Products
– Invest in high-quality, wig-specific products for all your care needs
– Avoid using regular hair products, which can be too harsh for wigs
– Keep a variety of styling products on hand to adapt to changing weather conditions

6. Regular Inspections
– Check your wigs regularly for signs of wear, such as thinning or excessive shedding
– Address any issues promptly to prevent further damage
– Know when it’s time to retire a wig and invest in a replacement

Caring for your wigs throughout the changing seasons requires attention, dedication, and the right knowledge. By following these comprehensive guidelines, you can ensure that your wig collection remains beautiful, comfortable, and long-lasting regardless of what Mother Nature throws your way. Remember that different wig types and personal preferences may require slight variations in care routines, so don’t be afraid to experiment and find what works best for you. With proper care and maintenance, your wigs will continue to boost your confidence and style in every season, year after year.

Posted on Leave a comment

PRODUCTS TO TAME FLYAWAYS ON HUMAN HAIR WIGS

Let’s get to it:

Flyaways can be a persistent issue with human hair wigs, but fear not! We’ve curated a detailed guide on combatting these pesky strands using specialized anti-frizz products.

Let’s delve into the world of haircare excellence:

1. Anti-Frizz Serum:
A lightweight anti-frizz serum like John Frieda Frizz Ease Extra Strength Serum can be applied to the wig to tame flyaways and add shine.


2. Anti-Frizz Oil:
Use an anti-frizz oil like Moroccanoil Treatment to smooth out the hair and reduce frizz. Apply a small amount to your hands and run them through the problematic areas.


3. Anti-Frizz Cream:
Opt for an anti-frizz cream designed specifically for human hair wigs like Living Proof No Frizz Nourishing Styling Cream. This can help control flyaways and keep the wig looking polished.


4. Leave-In Conditioner with Anti-Frizz Properties:
Choose a leave-in conditioner like Aveda Smooth Infusion Smoothing Masque that specifically addresses frizz concerns. Apply it to the wig to keep the hair hydrated and smooth.


Selecting the right anti-frizz product is key to maintaining the integrity of your human hair wig. Before making a choice, ensure compatibility and follow usage instructions diligently. Armed with these products, bid farewell to flyaways and welcome a wig that exudes perfection. Your hair’s best days are just a product away.

Posted on Leave a comment

Hair Masks And How To Use Them

If you’re struggling with severely damaged, dry, or dehydrated hair, your regular conditioner might fall short in providing the necessary moisture and nourishment. This signals the need to revamp your hair care routine with a more hydrating approach, incorporating a weekly repairing hair mask treatment.

Just like any hair care product, using a hair mask requires specific steps to reap its full benefits. While you may already include a hair mask in your routine, you might not be entirely familiar with the correct application method. We’ll address common hair mask queries, recommend hair-loving products, and offer a step-by-step tutorial on the proper way to apply a hair mask.

What Is a Hair Mask

Similar to how face masks nourish and hydrate your skin, hair masks perform the same function for your strands. Hair masks, also known as deep conditioners, are intensive moisturizing treatments typically incorporated into a hair care routine post-shampooing and before conditioning. You might question the distinction between a hair mask and a conditioner, which primarily lies in consistency and potency.

While conditioners hydrate hair, hair masks contain higher concentrations of potent ingredients and are left on the hair for a longer duration to provide a deeper treatment. Additionally, hair masks tend to have a thicker texture compared to lightweight conditioners, which are easily rinsed out. Available in various formulas catering to different hair needs, hair masks range from deep purple formulas for addressing brassiness to clay formulas for oil control and creamy masks for optimal hydration.

Why Should You Use a Hair Mask?

Hair masks offer numerous advantages for various hair types and are essential components of any hair care regimen. Tailor the frequency of use based on the extent of damage, whether it’s weekly or even daily. Just as you select specific skincare products for your skin type, opt for the appropriate hair mask suited to your hair type. This approach yields hydrated, softer-feeling hair, as the mask works to deeply repair and nourish from the inside out.

Should You Apply A Hair Mask On Wet Or Dry Hair?

Typically, it’s recommended to apply hair masks on damp or wet hair. Wet hair is more porous, allowing it to better absorb the nutrients from the mask, making it the preferred base for application. However, if you’re using an oil-based mask, such as coconut oil, you can apply it to dry hair. Water and oil repel each other, so an oil-based mask may not fully penetrate the hair shaft if applied to wet strands. Ultimately, it’s advisable to adhere to the instructions provided with the chosen mask.

Should You Use a Hair Mask Before Or After Shampooing?

Hair masks are ideally applied to freshly washed hair to allow for better penetration into the strands and scalp. It’s important to review the instructions provided with your specific product to determine its recommended usage and whether it’s suitable for application to the scalp. Many popular hair masks are part of a hair treatment system, typically including a matching shampoo and conditioner, for a comprehensive regimen. Alternatively, if not part of a set, consider using a sulfate-free shampoo suitable for all hair types, such as L’Oréal Paris Sulfate Free Simply Clean Shampoo with Essential Oil, which effectively cleanses without stripping the hair, thus minimizing potential damage.


How to Correctly Apply a Hair Mask

It’s important to adhere to the instructions provided with the particular hair care product you’re using. However, for optimal results, there’s a detailed application method to consider.

Now, delving into the technical steps of applying a hair mask, we’ve outlined a step-by-step guide below to help you provide your strands with the care and attention they deserve.

1. Assess Your Hair’s Needs First

The primary purpose of using a hair mask is to target specific hair concerns you may have, therefore, ensure you select a mask that aligns with those needs.

Hair Mask for Dry, Damaged Hair

For dry, split ends, or brittle hair, opt for a hydrating and repairing mask such as the Briogeo Don’t Despair, Repair! Deep Conditioning Hair Mask. It nourishes and rejuvenates weak, damaged, and tangled hair prone to split ends.


Hair Mask for Color-Treated Hair

To maintain hydration for color-treated hair without compromising its vibrancy, consider using a specialized hair mask that nourishes while safeguarding your color investment. An excellent choice is the FEKKAI Shea Butter Intense Mask, it replenishes lost moisture, enhances shine, and smooths hair texture, all while preserving your color’s vitality.


Hair Mask for Blonde/Silver Hair

If you’re experiencing brassy undertones in your blonde or silver hair, consider employing a potent anti-brass solution such as the L’Oréal Paris EverPure Sulfate-Free Anti Brass Purple Mask Treatment. This targeted treatment effectively combats brassiness in bleached hair, neutralizing unwanted yellow tones while providing nourishment to the strands.

2. Give Your Hair a Deep Clean

Before shampooing your hair, refer to the instructions provided with the hair mask to determine if shampooing beforehand is recommended. If you’re utilizing any of the aforementioned masks, begin by cleansing your hair thoroughly with a shampoo tailored to your hair type and concerns. A common error when using hair masks is applying them to dirty or oily strands. To prevent this, ensure your hair is clean by washing it beforehand.

3. Saturate Your Strands

To ensure optimal results from your hair mask, evenly distribute a generous amount of product from the mid-lengths to the ends of your hair, avoiding the roots unless directed otherwise by your chosen hair mask. For individuals with thick or curly hair, consider dividing your hair into four sections to ensure thorough saturation. Remember, avoid applying the mask to hair that is excessively wet, as this can dilute its effectiveness. Prior to application, gently squeeze out excess water from your hair.

4. Let the Hair Mask Sit for the Allotted Time

While conditioner typically requires only a few minutes of application, certain hair masks may necessitate a longer duration, ranging from five to twenty minutes or even more, depending on the product. Always adhere to the instructions provided with the mask. Most of the masks mentioned earlier require a maximum of five to eight minutes to reap all the benefits.
Rinsing out a hair mask prematurely means your hair may not fully benefit from its nourishing properties. Conversely, leaving a mask on for too long can lead to greasiness or limpness. Certain hair types, such as curly, coily, or chemically-treated hair prone to dryness, may benefit from leaving a mask on overnight. However, it’s essential to consult the directions and ingredients of your specific mask, as moisturizing treatments can be effective overnight, while protein-based masks may weigh hair down if left in for an extended period.

5. Rinse With Warm Water

Unless specified otherwise on the packaging, it’s advisable to rinse the hair mask with lukewarm water after the recommended duration, similar to rinsing out conditioner. Ensure thorough rinsing to prevent product buildup near the scalp and to avoid the appearance of greasiness on the lengths. After showering, wrap your hair in a microfiber towel or apply a heat protectant before blow-drying. The frequency of using a hair mask can vary, ranging from once a week for products left on for 20 minutes or longer, to daily use, depending on the product’s instructions.

0