Posted on Leave a comment

Defining Your Curl Pattern And Hair Porosity

Unlocking the Secrets: Defining Your Curl Pattern and Hair Porosity

Your hair is a crown you never take off, so it’s important to understand its unique characteristics. Knowing your curl pattern and porosity levels can help you choose the right products and techniques for healthy, gorgeous hair. Let’s dive in and unlock the secrets!


Understanding Curl Patterns

Curl patterns are defined by the actual shape and structure of each strand of hair. They range from straight to wavy, curly, and coily textures. Your curl pattern is determined by the symmetry and helical formation of the hair’s strands.

Straight Hair:

Straight hair follicles have a cylindrical shape that causes strands to grow outward in a straight line. The hair lies flat from the roots and lacks any curved shape.


Wavy Hair:

Wavy hair has a slightly curved “S” pattern. The cross-section is somewhat oval-shaped, creating a loose, sunk-in wave pattern rather than tight spirals.


Curly Hair:

Curly hair strands have a helical, spiraled structure that circles down from the roots in tubular ringlet shapes. Curlier patterns have a more elliptical-shaped cross-section.


Coily Hair:

Coily textures have very tight zig-zag curl patterns that resemble springs or coils. The strands have an extremely elongated cross-section that allows for maximum curve and kink.


Your curl pattern affects how your hair behaves – how products absorb, how moisture is retained, what styles will hold, and more. Straighter patterns tend to be lower maintenance, while curlier textures usually require more intentional care and styling techniques.

Exploring Hair Porosity

In addition to curl pattern, hair porosity is another key factor in how strands retain moisture and absorb products. Porosity refers to how well the hair’s outer cuticle layer allows moisture to penetrate the strands.

Low Porosity Hair:

Low porosity hair has very tight, compact cuticles that repel moisture, making it difficult for water and products to be absorbed. The cuticles lie flat against the hair shaft.

Normal Porosity Hair:

Normal or medium porosity means the cuticles aren’t too tight or too raised. Water and moisture can penetrate reasonably well while still being retained.

High Porosity Hair:

High porosity hair has gaps or cracks between the raised, open cuticles that allow moisture to be absorbed quickly but also lost rapidly. The strands feel rough and dry.

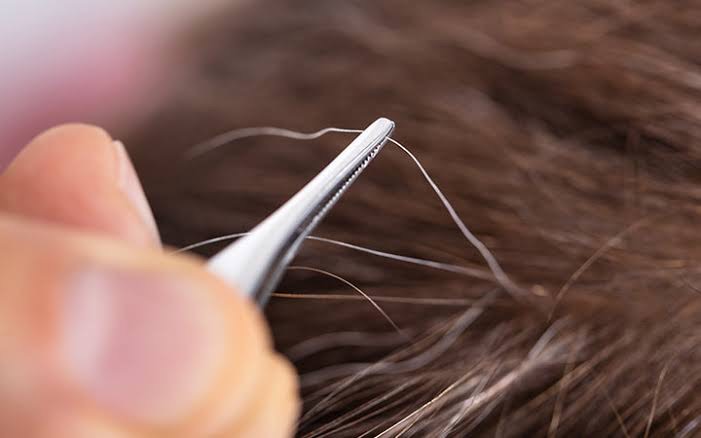
You can do a simple test to check your hair’s porosity:
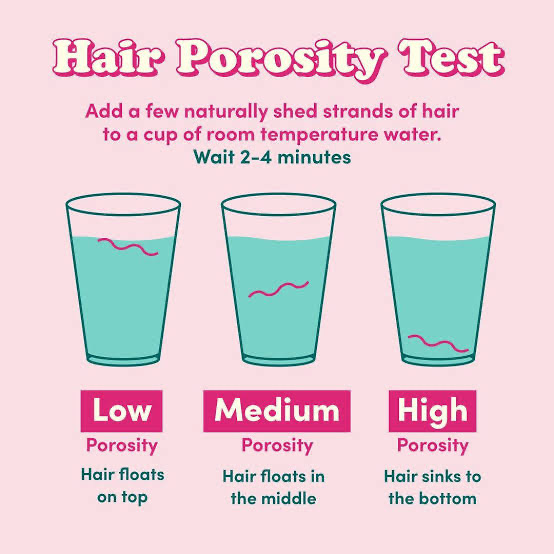
The Float Test:

Take a shed or snap off a few strands of hair and let them sit in a glass of water. If they sink immediately, you likely have high porosity hair. If they remain floating for 2-4 minutes before sinking, you have normal porosity. And if they never sink, even after leaving them overnight, you probably have low porosity.

The Spray Test:

Spray a bit of water onto a section of dry hair. If it quickly soaks in and makes your hair feel wet or damp, you have high porosity. If water sits on top and takes a while to absorb, you likely have lower porosity.


Your porosity affects which ingredients and products your hair needs. Low porosity may require more cuticle-lifting ingredients to aid absorption, while high porosity thrives on rich moisturizers and protein treatments.

Caring for Your Curl Pattern and Porosity

Now that you understand your curl pattern and porosity levels, you can start tailoring your hair care routine accordingly. Here are some tips for different curl types and porosities:

Low Porosity Hair:

– Use lighter liquid/cream stylers like leave-in conditioners and curl creams rather than thick butters/pomades that won’t absorb
– Weekly deep treatments with cuticle-lifting ingredients like apple cider vinegar or rice water rinses
– Avoid heavy oils, silicones and moisture-blocking ingredients
– Limit protein treatments to prevent overload and stiffness
– Concentrate products on ends rather than scalp area


High Porosity Hair:

– Rich, ultra-moisturizing deep conditioning masks with humectants like glycerin, honey, aloe
– Use light protein treatments monthly to fill in gaps/damage
– Steam treatments help raise cuticle so moisture penetrates better
– Layer creams/butters underneath oil sealants to lock in hydration
– Limit use of clarifying, drying shampoos


Loose Waves/Curls:

– Finger coiling or using a wide-tooth comb to shape waves while hair is wet
– Mousses and lighter curl creams are great for enhancing pattern
– Let hair dry in microfiber towel or cotton t-shirt rather than rough terry towels
– Quarterly trims keep ends healthy and shaped

Tight Coils/Kinks:

– Two-strand twist outs, braid outs or bantu knots create elongated curls
– Use a brush with mixed bristles to gently detangle and distribute product
– Thicker creams, custards and gels give frizz control and hold
– Low-manipulation protective styles retain length and moisture
– Spritz with water daily and seal with oils/butters for softness

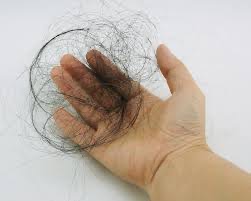
No matter your texture, be gentle when detangling and styling to prevent excessive shedding and damage. Deep conditioning is crucial for all curly girls! Experiment and find the right cocktail of products and techniques for your unique curl pattern and porosity.

Embracing Your Natural Beauty

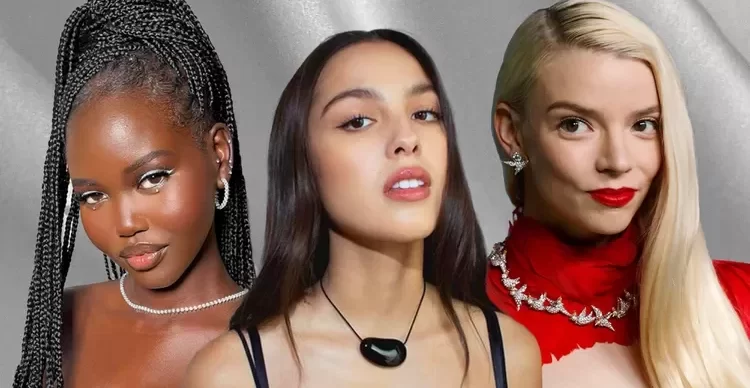
Your curl pattern and porosity are special traits that make your hair beautifully unique – don’t see them as obstacles to overcome! There are countless examples of people flourishing by fully embracing their natural texture.

Different textures are beautiful! But it does take some trial and error to find what truly works for your hair’s specific needs. The key is being patient and embracing your natural curl pattern and porosity rather than fighting against them.

So keep experimenting with various techniques and products until you discover your holy grail routine. It may be a journey, but seeing your gorgeous, healthy, defined curls flourish makes it incredibly rewarding.

Posted on Leave a comment

Hair and Beauty Myths Busted – The Truth Revealed by the Experts

We’ve all heard those long-standing hair and beauty myths that seem to get passed down from generation to generation. But in today’s world of advanced science and expert knowledge, it’s crucial to separate fact from fiction. At Jojo salon, we’re committed to providing our valued clients with accurate information and professional guidance. Let’s take a closer look at some of the most widespread hair and beauty myths and reveal the truth behind them.


Myth #1:

Plucking gray hair leads to more gray hair growing in.


Fact:

This persistent myth is completely unfounded. Plucking a gray hair does not cause more gray hairs to sprout in its place. Graying is a natural part of the aging process, and the rate at which your hair turns gray is primarily determined by your genetics. Other factors like stress, poor diet, smoking, and certain medical conditions can also contribute to premature graying. However, the act of plucking a gray hair itself has no impact on the emergence of new gray strands.

Myth #2:

Trimming hair frequently makes it grow faster.


Fact:

This myth is a common misconception. The rate at which your hair grows is determined by factors such as genetics, age, and overall health – not how often you trim it. Hair grows from the follicle under the skin, not from the ends. However, regular trims can help maintain healthy hair by removing split ends, preventing excessive breakage, and giving the appearance of fuller, more vibrant locks.

Myth #3:

Brushing hair 100 strokes a day makes it shinier.


Fact:

While brushing can help distribute your hair’s natural oils from the scalp to the ends, excessive brushing can actually lead to hair breakage, frizz, and damage – especially for those with dry, fragile, or chemically-treated hair. A few gentle brush strokes are typically enough to achieve a healthy shine without compromising the integrity of your strands.

Myth #4:

Pores open and close based on water temperature.


Fact:

This myth about pores is widely circulated but inaccurate. Pores are tiny openings in the skin, but they don’t actually open and close in response to water temperature. While hot water can help soften and cleanse the skin, it doesn’t cause pores to physically open or close. Factors like age, genetics, and skincare routines play a more significant role in the appearance and size of pores.

Myth #5:

Expensive products are always better for your hair and skin.


Fact:

The price tag on a product doesn’t necessarily reflect its quality or effectiveness. Many affordable drugstore brands offer excellent formulas that can rival or even outperform their high-end counterparts. When selecting hair and skincare products, it’s essential to choose formulas tailored to your specific needs, concerns, and hair/skin type – regardless of cost. Factors like ingredients, compatibility with your body chemistry, and professional recommendations should carry more weight than the price alone.

Don’t let outdated myths hold you back from embracing your natural beauty. Book your next appointment with us today, and let us help you separate fact from fiction on your journey to gorgeous, healthy hair and radiant, glowing skin. Our team is here to guide you with personalized advice and professional services tailored to your unique needs.

Posted on Leave a comment

Choosing the Right Hair Color for Your Skin Tone

Choosing the perfect hair color to complement your skin tone can significantly enhance your overall appearance. Understanding how different hair shades interact with varying skin undertones is crucial in achieving a harmonious and flattering look. Whether you’re considering a dramatic change or a subtle enhancement, finding the right hair color for your skin tone can make a world of difference. In this comprehensive guide, we’ll delve into the intricacies of selecting the ideal hair color based on your skin tone.


Understanding Skin Undertones

Before delving into hair color selection, it’s essential to understand the concept of skin undertones. Skin undertones are the subtle hues beneath the surface of your skin that can be categorized as warm, cool, or neutral.


Warm Undertones:
If your skin has hints of yellow, peach, or golden tones, you likely have warm undertones

Cool Undertones:
Skin with pink, red, or blue undertones indicates cool undertones.

Neutral Undertones:
A mix of warm and cool undertones, or a balanced, neutral tone, characterizes neutral undertones.

Matching Hair Colors to Skin Tones

Hair Colors for Warm Undertones

Golden Blonde:
Individuals with warm undertones often look stunning with golden blonde hues that complement their skin’s natural warmth.

Caramel or Honey Brown:
Warm undertones pair beautifully with caramel or honey brown shades, creating a natural and radiant look.

Copper Red:
Vibrant copper reds can bring warmth to the complexion of those with warm undertones, adding a striking and lively contrast.

Rich Chocolate Brown:
Deep, rich chocolate brown shades can enhance the warmth of the skin, offering a sophisticated and elegant appearance.

Hair Colors for Cool Undertones

Platinum Blonde:
Cool undertones harmonize well with icy platinum blonde, creating a striking contrast and an edgy, modern look.

Ash Brown:
Cool-toned individuals can opt for ashy brown shades that complement their skin’s coolness, providing a chic and contemporary aesthetic.

Burgundy:
Deep, cool-toned burgundy hues can add depth and richness to the complexion, creating a bold and dramatic effect.

Jet Black:
Cool undertones can carry off jet black hair effortlessly, exuding a classic and timeless allure.

Hair Colors for Neutral Undertones

Chestnut Brown:
Chestnut brown shades are versatile and complement neutral undertones, offering a balanced and natural appearance.

Soft Caramel Highlights:
Subtle caramel highlights can add dimension and warmth to the hair without overpowering the neutral skin tone.

Rose Gold:
The delicate balance of warm and cool tones in rose gold hair colors can beautifully complement neutral undertones, creating a soft and romantic look.

Determining Your Skin Tone

To accurately determine your skin tone, consider the following methods:

Vein Test:
Examine the veins on the underside of your wrist. If they appear greenish, you likely have warm undertones. If they appear bluish, your undertones are cool. If you can’t distinctly determine the color, you may have neutral undertones.

Jewelry Test:
Consider whether gold or silver jewelry complements your skin better. Warm undertones typically favor gold, while cool undertones lean towards silver. If both suit you, you may have neutral undertones.

White Fabric Test:
Hold a piece of white fabric near your face. If your skin appears radiant and healthy against pure white, you likely have warm undertones. If your complexion looks better against off-white or cream, you may have cool undertones.

Consultation with a Professional

While these guidelines can provide valuable insights, consulting with a professional colorist or stylist is crucial in achieving the best results. A skilled colorist can assess your skin tone, eye color, and personal style to recommend the most suitable hair color options tailored to your individual features and preferences.

In conclusion, selecting the perfect hair color for your skin tone involves a thoughtful consideration of your undertones and personal style. By understanding the interplay between hair colors and skin undertones, you can embark on a transformative hair color journey that accentuates your natural beauty and leaves you feeling confident and radiant.
Remember, experimenting with different hair colors can be an exciting and empowering experience, so embrace the process with an open mind and a sense of adventure. With the right hair color, you can illuminate your best features and express your unique personality with style and flair.

Posted on Leave a comment

Natural vs. Glam Makeup: Finding Your Perfect Look

In the ever-evolving world of beauty, two distinct makeup styles have emerged as enduring favorites: natural makeup and glam makeup. These contrasting approaches to cosmetic application cater to different preferences, occasions, and personal styles. In this blog post, we’ll dive deep into the world of natural and glam makeup, exploring their characteristics, techniques, and when to choose one over the other. Whether you’re a makeup novice or a seasoned beauty enthusiast, understanding these two styles can help you perfect your look for any occasion.


Understanding Natural Makeup

Natural makeup, often referred to as “no-makeup makeup,” is all about enhancing your features while maintaining a fresh-faced, effortless appearance. The goal is to look like the best version of yourself without appearing overly made up.

Key Characteristics of Natural Makeup:
1. Light coverage foundation or tinted moisturizer
2. Subtle contouring and highlighting
3. Neutral eyeshadow shades
4. Minimal eyeliner, if any
5. Natural-looking lashes
6. Soft blush for a healthy glow
7. Nude or subtle lip colors

Techniques for Achieving a Natural Makeup Look:

1. Skin Preparation:
– Start with a thorough skincare routine to create a smooth canvas.
– Use a lightweight moisturizer and primer to hydrate and even out skin texture.

2. Foundation Application:
– Opt for a sheer to medium coverage foundation or tinted moisturizer.
– Apply with a damp beauty sponge or fingers for a seamless finish.
– Focus on areas that need coverage, leaving well-behaved skin bare if possible.

3. Concealer:
– Use concealer sparingly, only on areas that need extra coverage (under eyes, blemishes).
– Choose a shade that matches your skin tone exactly.

4. Cheeks:
– Apply a small amount of cream or powder blush to the apples of your cheeks.
– Blend well for a natural-looking flush.

5. Eyes:
– Use neutral eyeshadow shades that complement your skin tone.
– Apply a light wash of color across the lid and blend well.
– Curl your lashes and apply a coat of lengthening mascara.

6. Brows:
– Fill in any sparse areas with light, feathery strokes using a brow pencil or powder.
– Brush through with a spoolie for a natural look.

7. Lips:
– Choose a lip color close to your natural lip shade.
– Consider using tinted lip balm for a subtle pop of color and hydration.

When to Choose Natural Makeup:
– Everyday wear, especially for work or school
– Casual outings or daytime events
– When you want to look polished but not overdone
– For a fresh, youthful appearance

Understanding Glam Makeup

Glam makeup, on the other hand, is all about drama, boldness, and making a statement. This style embraces vibrant colors, intense pigmentation, and dramatic techniques to create a high-impact look.

Key Characteristics of Glam Makeup:
1. Full coverage foundation
2. Bold contouring and highlighting
3. Dramatic eye makeup, often including smoky eyes or cut creases
4. False lashes or heavy mascara
5. Defined brows
6. Strong blush or bronzer
7. Bold lip colors

Techniques for Achieving a Glam Makeup Look:

1. Base Preparation:
– Use a pore-filling primer to create a smooth canvas.
– Apply a long-wearing, full-coverage foundation.
– Set with powder for a flawless finish.

2. Contouring and Highlighting:
– Contour cheekbones, jawline, and nose for definition.
– Apply highlighter to the high points of the face for a radiant glow.

3. Eyes:
– Prime eyelids to ensure longevity and vibrancy of eyeshadows.
– Create dramatic eye looks using bold colors or smoky techniques.
– Apply winged eyeliner for added drama.
– Use false lashes or multiple coats of volumizing mascara.

4. Brows:
– Fill and shape brows for a bold, defined look.
– Consider using brow pomade for intense color and shape.

5. Cheeks:
– Apply blush or bronzer generously for a sculpted look.
– Layer cream and powder products for intensity and longevity.

6. Lips:
– Line lips for definition.
– Choose bold lip colors or create ombré effects.
– Consider using liquid lipsticks for long-lasting wear.

7. Setting:
– Use a setting spray to lock the look in place and meld the layers of makeup together.

When to Choose Glam Makeup:
– Evening events or parties
– Special occasions like weddings or proms
– Photoshoots or performances
– When you want to make a bold statement with your look

Comparing Natural and Glam Makeup

1. Time Investment:
– Natural makeup typically takes less time to apply, making it ideal for everyday wear.
– Glam makeup requires more time and precision, often involving multiple steps and products.

2. Skill Level:
– Natural makeup can be more forgiving for beginners.
– Glam makeup often requires more advanced techniques and practice to perfect.

3. Product Usage:
– Natural makeup uses fewer products and lighter application.
– Glam makeup involves more products and layers for an intense effect.

4. Versatility:
– Natural makeup is suitable for a wide range of settings and occasions.
– Glam makeup is often reserved for specific events or environments.

5. Maintenance:
– Natural makeup generally requires less touch-up throughout the day.
– Glam makeup may need more frequent checks and touch-ups to maintain its intensity.

Bridging the Gap: The “Soft Glam” Trend

In recent years, a hybrid style known as “soft glam” has gained popularity. This look combines elements of both natural and glam makeup, offering a middle ground for those who want a bit more drama than natural makeup but less intensity than full glam.

Characteristics of Soft Glam:
– Medium to full coverage foundation
– Subtle contouring with a stronger highlight
– Neutral eyeshadows with a touch of shimmer
– Defined but not overly bold brows
– Fluttery lashes (either natural or subtle falsies)
– A stronger lip color than natural makeup, but not as bold as full glam

Choosing Between Natural and Glam Makeup

When deciding between natural and glam makeup, consider the following factors:

1. Occasion: What type of event are you attending?
2. Personal Style: Which look aligns more with your personal aesthetic?
3. Time Available: How much time do you have for application and touch-ups?
4. Comfort Level: Which style makes you feel most confident and comfortable?
5. Skin Condition: How does your skin respond to heavier makeup application?

Tips for Mastering Both Styles

1. Invest in Quality Tools:
– Good brushes and applicators can make a significant difference in both natural and glam looks.

2. Practice Techniques:
– Experiment with both styles to improve your skills and find what works best for you.

3. Understand Your Face Shape:
– Knowing your face shape can help you apply both styles more effectively, especially when it comes to contouring and highlighting.

4. Pay Attention to Lighting:
– Natural makeup looks best in natural light, while glam makeup can stand up to more intense lighting situations.

5. Don’t Forget Skincare:
– A good skincare routine is essential for both styles, ensuring your skin looks its best whether you’re going natural or glam.

6. Blend, Blend, Blend:
– Regardless of the style, thorough blending is key to a polished look.

Embracing Versatility in Makeup

The beauty of makeup lies in its versatility and personal expression. Whether you prefer the fresh-faced allure of natural makeup or the bold statement of glam, both styles have their place in a well-rounded beauty routine. Many makeup enthusiasts enjoy alternating between the two styles or even creating their own hybrid looks.

Remember, there’s no right or wrong choice between natural and glam makeup. The best look is the one that makes you feel confident and beautiful. Don’t be afraid to experiment with both styles, adapt them to your preferences, and most importantly, have fun with your makeup journey.

Makeup is a form of self-expression and creativity. Whether you’re enhancing your natural features with a subtle touch or transforming yourself with a glamorous look, the goal is to feel comfortable and confident in your own skin. So go ahead, play with both styles, and discover the looks that truly reflect your unique personality and style.

Posted on Leave a comment

Men’s Hair Care and Styling: Looking Your Best from Root to Tip

In today’s world, men’s grooming has evolved far beyond the basics. A well-maintained hairstyle can significantly boost your confidence and leave a lasting impression. This comprehensive guide will delve deep into the art and science of men’s hair care and styling, equipping you with the knowledge to achieve and maintain healthy, great-looking hair.


1. Understanding Your Hair Type and Texture

The foundation of effective hair care lies in understanding your unique hair type and texture. This knowledge will guide your product choices and styling techniques.

Hair Types:
– Straight: Tends to be oily, lies flat
– Wavy: Falls between straight and curly, prone to frizz
– Curly: Forms an “S” shape, can be dry
– Coily: Tightly coiled, very prone to dryness

Hair Textures:
– Fine: Thin strands, can appear limp
– Medium: Average thickness, most versatile
– Thick: Dense strands, can be hard to manage

Determining Factors:
– Genetics
– Ethnicity
– Age
– Hormones
– Environmental factors

Take time to assess your hair. Is it oily at the roots but dry at the ends? Does it frizz easily in humidity? Understanding these characteristics will help you tailor your hair care routine effectively.

2. The Science of Hair Growth and Health

Hair growth occurs in cycles:
1. Anagen (growth phase): Lasts 2-7 years
2. Catagen (transition phase): Lasts about 10 days
3. Telogen (resting phase): Lasts about 3 months

Factors affecting hair health:
– Diet: Protein, vitamins (especially B vitamins), and minerals are crucial
– Stress: Can lead to hair loss and premature graying
– Hormones: Imbalances can affect hair growth and texture
– Medications: Some can cause hair loss as a side effect
– Scalp health: A clean, well-nourished scalp promotes healthy hair growth

3. Proper Washing and Conditioning Techniques

Washing:
– Frequency: Depends on hair type, lifestyle, and environment
– Oily hair: May need daily washing
– Normal to dry hair: 2-3 times a week usually suffices
– Very dry or curly hair: May benefit from co-washing (washing with conditioner only) between shampoo sessions

– Water temperature: Use lukewarm water to preserve natural oils
– Technique:
1. Wet hair thoroughly
2. Apply a small amount of shampoo to the scalp
3. Massage gently with fingertips in circular motions
4. Rinse thoroughly until water runs clear
5. Repeat if necessary (e.g., after intense workouts or heavy product use)

Conditioning:
– Apply to mid-lengths and ends, avoiding the scalp
– Leave in for 1-3 minutes before rinsing
– For extra hydration, use a deep conditioning mask once a week
– Consider leave-in conditioners for very dry or curly hair

4. Drying and Protecting Your Hair

Proper drying techniques prevent damage and frizz:
– Pat hair gently with a microfiber towel or old t-shirt
– Avoid rubbing vigorously, which can cause breakage
– Air dry when possible to minimize heat damage
– If using a blow dryer:
1. Apply a heat protectant product
2. Use the lowest heat setting necessary
3. Keep the dryer moving to avoid concentrating heat in one area
4. Finish with a cool shot to seal the hair cuticle

5. Choosing the Right Products

Shampoo:
– Clarifying: For occasional deep cleaning or oily hair
– Volumizing: For fine or limp hair
– Moisturizing: For dry or curly hair
– Color-safe: For dyed hair
– Dandruff: For flaky or itchy scalps

Conditioner:
– Rinse-out: Standard daily use
– Leave-in: Extra moisture for dry or curly hair
– Deep conditioning masks: Intensive treatments

Styling Products:
– Pomade: For slick, high-shine styles
– Wax: For textured, matte finishes
– Gel: For strong hold and shine
– Mousse: For volume and light hold
– Sea salt spray: For beach-like texture
– Hair oil: For shine and frizz control

Consider your hair type, desired style, and any specific concerns (e.g., dandruff, thinning) when selecting products.

6. Styling Techniques for Different Hair Types

Straight Hair:
– Use volumizing products at the roots for lift
– Try a side part or slicked-back look for versatility
– Experiment with texturizing products for added dimension

Wavy Hair:
– Enhance natural waves with sea salt spray or curl-defining cream
– Scrunch hair while damp to encourage wave formation
– Use a diffuser attachment when blow-drying to maintain wave pattern

Curly Hair:
– Apply styling products to soaking wet hair to define curls
– Use the “praying hands” method to distribute product evenly
– Avoid brushing dry hair; use fingers or a wide-tooth comb when wet
– Try the “plopping” technique for frizz-free drying

Coily Hair:
– Focus on moisture retention with leave-in conditioners and oils
– Use the “LOC” method: Leave-in conditioner, Oil, Cream
– Consider protective styles to minimize manipulation and damage

Thinning Hair:
– Keep haircuts short and textured for a fuller appearance
– Use volumizing products and techniques (e.g., blow-drying against the grain)
– Consider hair fibers or scalp concealers for temporary fullness

7. Haircut Maintenance and Communication with Your Barber

Regular trims are essential for maintaining your style and hair health:
– Every 2-4 weeks for very short styles
– Every 4-6 weeks for medium styles
– Every 6-8 weeks for longer styles

Effective communication with your barber:
– Bring reference pictures of styles you like
– Learn basic terminology (e.g., taper, fade, texture)
– Discuss your daily routine and styling preferences
– Be open about any hair concerns or goals

8. Addressing Common Hair and Scalp Issues

Dandruff:
– Use anti-dandruff shampoo containing zinc pyrithione, ketoconazole, or selenium sulfide
– Massage the scalp gently to exfoliate
– Consider tea tree oil as a natural alternative

Hair Loss:
– Consult a dermatologist for professional advice
– Consider over-the-counter treatments like minoxidil
– Explore hair transplant options for severe cases

Oily Scalp:
– Use clarifying shampoos
– Avoid over-washing, which can stimulate more oil production
– Try dry shampoo between washes

Dry Scalp:
– Use moisturizing shampoos and conditioners
– Consider a scalp oil treatment
– Avoid very hot water when washing

9. Nutrition and Lifestyle for Optimal Hair Health

Diet:
– Protein: Essential for hair structure (lean meats, fish, eggs, legumes)
– Biotin: Promotes hair growth (nuts, seeds, avocados)
– Iron: Prevents hair loss (lean red meat, spinach, lentils)
– Vitamin C: Aids in iron absorption (citrus fruits, berries, bell peppers)
– Omega-3 fatty acids: Nourish hair follicles (fatty fish, flaxseeds, chia seeds)

Lifestyle:
– Stay hydrated: Aim for 8 glasses of water daily
– Manage stress: Practice relaxation techniques, exercise regularly
– Get adequate sleep: 7-9 hours per night
– Limit heat styling and chemical treatments
– Protect hair from sun damage with hats or UV-protective products

10. Embracing Your Natural Hair and Experimenting with Styles

– Work with your natural texture rather than against it
– Experiment with different styles to find what suits you best
– Consider your face shape when choosing a hairstyle:
– Oval: Most styles work well
– Round: Add height on top to elongate the face
– Square: Soften angles with textured styles
– Heart-shaped: Balance a wider forehead with fuller sides
– Long: Add width with layered cuts

11. Special Considerations for Gray Hair

– Embrace the silver fox look or consider coloring options
– Use purple-toned shampoos to prevent yellowing
– Adjust your styling routine as gray hair can be coarser and drier

12. Travel and On-the-Go Hair Care

– Invest in travel-sized products
– Bring a small spray bottle for refreshing styles
– Consider versatile styles that can be easily maintained while traveling

Remember, achieving great hair is a journey, not a destination. Be patient with your hair, and don’t be afraid to experiment. With consistent care and the right techniques, you’ll be well on your way to having the healthy, stylish hair you desire.

Posted on Leave a comment

How to Achieve a Flawless Base: Tips for Perfecting Foundation and Concealer Application

Are you tired of struggling with uneven foundation and concealer application? Do you dream of a smooth, natural-looking base that enhances your features and boosts your confidence? Look no further! In this comprehensive guide, we’ll share expert tips, tricks, and techniques for perfecting your foundation and concealer application, ensuring a flawless base that turns heads.


Preparation is Key: Setting the Stage for a Flawless Base
Before diving into foundation and concealer application, it’s essential to prepare your skin for makeup. A well-prepared canvas is crucial for a smooth, even finish.

1. Moisturize: Apply a lightweight moisturizer to hydrate your skin, creating an even canvas for makeup. Look for a moisturizer containing hyaluronic acid, ceramides, or niacinamide for optimal hydration and skin health.

2. Prime: Use a primer to control shine, reduce pores, and extend wear. Choose a primer suitable for your skin type (silicone-based for dry skin, water-based for oily skin).

3. Exfoliate: Gently exfoliate your skin 1-2 times a week to remove dead skin cells and ensure a smooth finish. Use a chemical exfoliant containing alpha-hydroxy acids (AHAs) or beta-hydroxy acids (BHAs) for optimal results.

4. Allow Products to Absorb: Give your moisturizer and primer time to absorb fully into the skin before applying foundation and concealer.

Foundation Application: The Art of Creating a Seamless Finis
With your skin prepared, it’s time to apply foundation. Remember, the goal is to create a natural-looking base that enhances your features.

1. Choose the Right Shade: Select a foundation that matches your skin tone, considering undertones (pink, yellow, or neutral). Test foundation shades on your jawline to find your perfect match.

2. Apply with the Right Tool: Use a foundation brush, beauty blender, or your fingers, depending on your preference and skin type. Foundation brushes offer precision, while beauty blenders provide a smooth, airbrushed finish.

3. Start in the Center: Apply foundation to the center of your face and blend outwards, ensuring even coverage. This technique helps prevent excess product buildup around the hairline and jawline.

4. Blend, Blend, Blend: Make sure to blend foundation into hairlines, jawlines, and edges for a seamless finish. Use light, gentle strokes to merge foundation with your skin.

5. Less is More: Start with a light layer and build coverage as needed, avoiding cakey buildup. Remember, it’s easier to add more foundation than it is to remove excess product.

6. Set with Powder: Set your foundation with a light dusting of powder to extend wear and prevent creasing.

Concealer Application: Targeting Imperfections with Precision
Concealer is your secret weapon for targeting imperfections and creating a flawless base.

1. Select the Right Concealer: Choose a concealer one shade lighter than your foundation for under-eye coverage and a shade that matches your foundation for blemishes.

2. Apply with Precision: Use a small concealer brush or a beauty blender to target specific areas. Pat concealer into place, especially under the eyes, to avoid creasing.

3. Less is More: Use a light hand when applying concealer, building coverage as needed. Remember, concealer is meant to enhance your natural features, not hide behind layers of product.

4. Target Specific Areas: Use concealer to target dark circles, blemishes, scars, and red spots.

Additional Tips for a Flawless Base

1. Highlight and Contour: Apply highlighter and contour products to enhance your natural features and create dimension.

2. Blend, Blend, Blend: Remember to blend all makeup products, ensuring a seamless finish.

3. Set with Powder: Set your concealer and highlighter with a light dusting of powder to extend wear and prevent creasing.

4. Practice Makes Perfect: Don’t be discouraged if it takes a few attempts to find your perfect foundation and concealer application technique. Practice makes perfect.

Common Mistakes to Avoid

1. Insufficient Blending: Failing to blend foundation and concealer can lead to an uneven finish and noticeable lines.

2. Incorrect Shade: Choosing a foundation or concealer shade that doesn’t match your skin tone can result in an unnatural finish.

3. Excess Product: Applying too much foundation or concealer can lead to cakey buildup and an uneven finish.

4. Not Allowing Products to Absorb: Not giving moisturizer and primer time to absorb fully into the skin can lead to an uneven finish.

Achieving a flawless base requires patience, practice, and the right techniques.

Posted on Leave a comment

How To Straighten Hair Without Damage

There are days when achieving smooth, sleek, and shiny hair is a top priority, and one of the quickest methods to attain this look is by straightening the hair.


However, using a flat iron or other heated tools can potentially cause damage, especially if they are used incorrectly or excessively. Moreover, the process of safely straightening the hair can be somewhat intricate, involving the application of heat protectants, gentle handling in areas prone to breakage, and selecting the appropriate temperature for the hair type.

Therefore, it’s reasonable to feel overwhelmed and potentially skip some steps.
So, how frequently can hair be straightened without causing damage, and what are the proper techniques for heat styling hair to prevent breakage? We’ve consulted with hairstylists to provide you with valuable insights into the art of hair straightening without causing harm. Here, we’ll share expert advice and tips.

Brushing

This is the simplest method to straighten natural hair, but it does require that you have the time to wait for your hair to fully dry. Find your part with a comb or your fingers, and use your hands to brush your damp hair down and pull it tightly. Keep doing this every few minutes until your hair is completely dry, adding more leave-in conditioner if necessary. Though you may not end up with much lift at the root, you will get a nice, natural hair texture that doesn’t look too done. If you need to tame any strays, stick to an oil-based product to smooth hair out.

Wrapping

While your hair is wet, comb and divide it down the middle. Comb the left section all the way over to the right (yes, it’s a kind of combover) and wrap it around the back of your head. Use large bobby pins to secure it. Guide the right portion over the left side of your head, and wrap and pin it as well. Let your hair air dry completely, which could take time. To sleep on it overnight, wrap it all up in a silk scarf.

You can also blow dry it all with cool air until nearly before you wrap. To prevent the bobby pins from leaving dents, sandwich a sliver of cardboard or tissue between pins and hair.

Rolling

It may seem old-fashioned, but this technique is not only tried and true, it’s the best choice for straightening coarser, curlier textures. Use about six jumbo rollers – plastic rollers yield a smoother effect than those made of Velcro or foam.

Straight Hair

When dealing with already straight hair, you don’t need to do much to achieve a sleek look. Nevertheless, you should minimize styling time to avoid heat damage and take certain steps to preserve the health of the hair.

The ideal temperature for straight, finer strands is lower, so select the lowest setting possible for the straight hair.

Layer stylers with heat protection as you progress from wet hair to hair preparation and styling.

Straight hair typically requires a quick and straightforward process. Once the hair is dry, use a flat iron to smooth it out. Given that hair is already naturally straight, it shouldn’t take more than five minutes to achieve an ultra-sleek result.

Due to the finer strands of straight hair, it’s best to use hot tools sparingly to prevent damage. It’s safer to keep the temperature lower, ideally between 350 and 380 degrees Fahrenheit, for fine, thin hair types.

Appropriate temperature settings are key, you can straighten the hair effectively and minimize the risk of damage. Remember that, regardless of the hair type, it’s essential to use heat protectants and prioritize the health and hydration of hair

Posted on Leave a comment

How to Get Rid of Dry Scalp

Dealing with a dry scalp is no joke. It’s uncomfortable, itchy, and can even become painful if ignored. The truth is, nobody is immune to experiencing it – it impacts both women and men.

Initially, a dry scalp often shows up as irritation, resulting in flaking skin. It might not sound pleasant, but it’s a common issue that can be managed.

Just like your skin, your hair deserves care too. If you’re serious about skincare, don’t overlook the significance of haircare. After all, your hair is an integral part of you, and it deserves attention and proper treatment.

Consider this: hair conditions such as dry scalp can stem from skin issues like dryness or eczema, and they can even exacerbate skin conditions like acne. Whether it’s dry hair or a dry scalp, it’s all bothersome but manageable with a bit of care.

Whether you’re managing your natural hair or hair extensions, tending to your locks is crucial, whether they’re clipped on or grown out.

If you’re grappling with how to tackle your dry scalp, it’s essential to grasp its nature, causes, and treatment options. Remember, you’re not alone, and with some tender loving care, your dry scalp will soon be nourished and healthy again.

What is a Dry Scalp?

Dry scalp is a condition that arises when the scalp produces insufficient moisture or retains less moisture because of a lack of oil.

Consequently, when your scalp becomes dry, it becomes irritated, leading to flaking of the skin, resembling dandruff, often causing confusion between the two.


WHAT IS DANDRUFF?

Whereas dry scalp manifests as tiny dry flakes of dead skin, dandruff presents as larger, oily flakes that are typically yellowish-white in color.


Distinguishing Dandruff from Dry Scalp

Dandruff is a scalp issue characterized by the shedding of dead skin cells. Despite their similarities, dandruff and dry scalp are distinct conditions, each necessitating its own treatment approach.

Causes of Dry Scalp

Dry scalp can be bothersome, but understanding its origins is crucial. When pondering over the question “Why is my scalp so dry?” consider the various factors contributing to its dryness.

Dry Skin

People with dry skin often experience dry scalp, as noted by Medical News Today.

Harsh Hair Care Ingredients

Many hair products contain harsh chemical ingredients like alcohol, which can dehydrate the scalp. Opt for products with natural, hydrating ingredients instead.

Excessive Washing

Over-washing, especially with products containing alcohol, can strip the scalp of its natural oils, leading to dryness. It’s important to determine the appropriate washing frequency based on your hair type.

Skin Conditions

Scalp conditions like seborrhea, seborrheic dermatitis, and eczema can cause dry scalp, sometimes triggered by ingredients in hair products. Seeking professional help is advisable for underlying skin conditions.

Cold, Dry Air

Dry air, particularly in colder months, can exacerbate scalp dryness.

Aging

With age, the skin’s oil-producing glands become less active, resulting in reduced natural moisture for the scalp. Using moisturizing products becomes crucial as you age to maintain scalp and hair hydration.

Allergies

Allergic reactions to hair product ingredients, especially harsh ones, are common culprits behind dry scalp.

How to Manage Dry Scalp

Dealing with dry scalp can involve various strategies. Here are some ways to address it:

1. Opt for New Hair Products

Choose shampoos, conditioners, and styling products free of harsh ingredients that can dry out your scalp. Look for products tailored to your specific hair type, especially if you have dry skin and hair prone to sensitivity.


2. Reduce Washing Frequency

Give your hair a break by washing it less frequently. Over-washing can contribute to drying out both your hair and scalp.

3. Use Exfoliating Products

Just like the skin on the rest of your body, your scalp needs to shed dead skin cells. Incorporate an exfoliating scalp mask into your routine once or twice a week to reduce flakiness and buildup and soothe irritation.


4. Try Aspirin

Aspirin contains salicylic acid, which is known for its restorative properties. Crush two aspirin tablets and add the powder to your shampoo to help treat dry scalp. Rinse the mixture out after letting it sit for 2 minutes for optimal results.

5. Apply Natural Oils

Restore moisture to your scalp by applying natural oils like almond oil, olive oil, coconut oil, or jojoba oil. These oils can help ease irritation and provide anti-inflammatory benefits. Warm up the oil of your choice and apply it evenly to your scalp, leaving it on overnight for best results.


6. Use Apple Cider Vinegar

Rinsing your hair with a mixture of apple cider vinegar and water can help treat dry scalp. Apple cider vinegar acts as a natural astringent, protecting your scalp from flakes and fungi. After shampooing, rinse your hair with a solution of two cups of apple cider vinegar and two cups of cold water.


7. Try Baking Soda

Consider using baking soda as a shampoo alternative for a few days to combat dry scalp. Rub a handful of baking soda into your hair and scalp, then rinse it out with warm water after letting it sit for a couple of minutes.


Posted on Leave a comment

How to Stop Excessive Natural Hair Shedding

How to Finally Stop Excessive Natural Hair Shedding

Shedding some hair each day is normal and expected – in fact, shedding 50-100 strands per day is perfectly within the realm of healthy hair. However, if you’re noticing significantly more hair fall or excessive shedding, it could indicate an underlying issue that needs to be addressed. Excessive shedding, if left unchecked, can lead to thinning hair, bald spots, and even permanent hair loss over time.

There are several potential triggers for excessive natural hair shedding, including hormonal changes, stress, nutritional deficiencies, harsh hair care practices, medical conditions, and genetics. Identifying and treating the root cause is key to stopping the excessive shedding and getting your hair health back on track.


What Causes Excessive Hair Shedding?

Hormonal Imbalances
Fluctuations in hormones can drastically impact hair growth cycles and lead to excessive shedding. Some common examples include pregnancy, postpartum, menopause, thyroid disorders like hypo- or hyperthyroidism, polycystic ovary syndrome (PCOS), and starting or stopping hormonal birth control use.

Stress
High levels of psychological stress create a rise in cortisol that can trigger excessive shedding by prematurely pushing more follicles into the resting or “telogen” phase. Major life stressors, physical trauma or illness, poor sleep, and chronic psychological stress can all contribute to this issue.

Nutritional Deficiencies
Not getting enough of key nutrients like protein, iron, zinc, biotin, vitamin C, and vitamin D can disrupt the hair growth cycle and density over time. Nutritional deficiencies often stem from very low-calorie diets, dietary restrictions, poor gut health, or medical conditions that impact nutrient absorption.

Harsh Hair Care
Excessive use of heat styling tools, chemically straightening or relaxing treatments, very tight hairstyles like braids or ponytails, over-manipulation from brushing or styling, and physical or mechanical damage can all traumatize and weaken hair follicles leading to increased shedding.

Medical Conditions
Certain medical conditions are directly linked to excessive hair shedding and hair loss. This includes autoimmune disorders like alopecia areata, scalp infections like ringworm, iron-deficiency anemia, thyroid issues, and occasionally cancer treatments like chemotherapy.

Genetics
For some individuals, excessive shedding and thinning hair is primarily driven by genes and family history of hereditary hair loss patterns like androgenic alopecia or female pattern baldness.

Tips to Stop Excessive Shedding

1. Identify the Root Cause
The first step in stopping excessive shedding is pinpointing the underlying reason why your hair is shedding at an excessive rate. Visiting a dermatologist for hormonal testing, bloodwork, scalp examination, pull tests, and other evaluations can help reveal the trigger.

2. Adjust Your Hair Care Practices
If your excessive shedding seems to be stemming from harsh hair care practices, it’s time to switch to a gentler regimen. Use less heat styling, minimize or avoid chemically straightening or relaxing treatments, be very gentle when detangling, and properly protect hair while sleeping by covering it or using a silk/satin pillowcase.


3. Manage Stress
Since stress is a major contributor to excessive shedding, it’s important to find ways to keep your stress levels in check. Practicing yoga, meditation, deep breathing exercises, and making time for relaxing activities can all help prevent hair-shedding stress.


4. Boost Nutrition
Ensure you’re getting adequate amounts of protein, iron, zinc, biotin, vitamin C, vitamin D and other key nutrients that promote hair growth and strength. If bloodwork reveals any deficiencies, supplement accordingly and focus on a nutrient-dense diet.


5. Try Hair Growth Treatments
For areas experiencing excessive shedding or thinning, use topical treatments containing ingredients like 2% ketoconazole, pumpkin seed oil, rosemary oil, or minoxidil (rogaine) which can help block DHT and stimulate new growth. Low-level light therapy with laser combs or laser caps may also help.


6. Consider Medication
If your excessive shedding is hormonal or stems from a medical condition, your doctor may prescribe medication to help regulate hormones or treat the underlying issue.


7. Use the Inversion Method
An alternative technique that some find helpful for excessive shedding is the inversion method. This involves massaging the scalp while hanging upside down for 2-4 minutes per day to increase blood flow to follicles and potentially reduce shedding.

8. Be Patient and Consistent
With any excessive shedding treatment plan, patience is key. It can take 6-12 months to see full regrowth and notice significant results as new hair cycles through the growth phases. Consistency with the treatment plan is also crucial to allowing new hair to properly regenerate.

If excessive shedding persists for over 6 months despite your best efforts, it’s a good idea to seek medical guidance from a dermatologist or trichologist (hair/scalp specialist). They can run additional tests, try different treatment approaches, and rule out any larger underlying health issues.

While excessive shedding can certainly be frustrating and demoralizing, there are solutions that can help get it under control with some strategic lifestyle adjustments, treatments, and a proactive plan. By addressing the root cause, making hair health a priority, and using clinically-proven regrowth methods, you can absolutely overcome this vexing hair issue.

Posted on Leave a comment

Mastering Gorgeous Wig Hairstyles at Home: A Step-by-Step Guide

If you love the versatility of wearing wigs, you know how transformative different hairstyles can be. But recreating those coveted wig looks at home can sometimes feel daunting. From using the right products and tools to nailing down proper techniques, there’s a bit of a learning curve when it comes to wig styling.

Don’t worry, you’ve got this! With some expert tips and step-by-step guidance, you’ll be achieving stunning wig hairstyles right in the comfort of your own home. In this comprehensive guide, we’ll walk through 5 must-try, on-trend wig styles that are perfect for everything from special occasions to an everyday glam look. Get ready to master these stunning styles!

1. Sleek & Straight Perfection
This chic, polished wig style is a classic that works for any setting or occasion. It’s all about achieving a smooth, ultra-sleek look from roots to ends.


What You’ll Need:
– Wig with straight or straightened hair
– Wig brush or wide-tooth comb
– Wig hairspray or smoothing serum
– High-quality flatiron or straightening iron

Step-by-Step:
a) Start with a clean, detangled wig that has been properly prepped and mounted on a wig head or stand.

b) Apply a wig-safe hairspray or smoothing serum from mid-lengths to ends to reduce frizz and add shine. Avoid applying too much product at the roots to prevent weighing the hair down.

c) Section off the hair into manageable portions, starting from the bottom layers. Using a flatiron set to a lower heat setting (around 300°F for synthetic fiber wigs, up to 400°F for human hair wigs), gradually straighten one-inch sections by slowly pulling the iron from roots to ends.

d) Work your way up the head in sections, straightening all of the hair thoroughly. For a sleek crown, use a fine-tooth comb to create a straight part down the center or side.

e) Once all hair is straight, take the flatiron and gently glide it over the top portion from front to back to set the cuticle and create a glassy finish.

f) Complete the look by applying a light, smoothing wig hairspray all over for added hold and shine.

Pro Tips: Invest in a high-quality flatiron or straightening iron with ceramic plates to prevent damage and evenly straighten wig hair. Allow straightened hair to fully cool before styling to “set” the look.

2. Cascading Bombshell Curls
Face-framing, cascading curls create an undone yet ultra-glamorous wig style that’s perfect for any elegant occasion or event. Achieve this coveted look by following these steps:


What You’ll Need:
– Human hair or high-heat-resistant synthetic wig
– Wig hairspray or heat protectant
– Barrel or wand curling iron (1-inch or larger barrel)
– Wig clips or sectioning clips
– Wide-tooth comb

Step-by-Step:
a) Start with a clean, detangled wig mounted securely on a wig head. Lightly mist all over with a heat protectant spray or wig hairspray to reduce damage and control frizz.

b) Section the hair off into manageable portions, starting with the back lower layers and working upwards towards the crown area in a horseshoe pattern.

c) Using a large-barrel curling iron (1 to 1.25 inches), wrap 1-inch sections of hair around the iron barrel. Be sure to keep the curl sections angling away from the face for a cascading effect.

d) Hold each section tightly wrapped around the barrel for 10-15 seconds depending on the wig hair type. Release and allow curls to cool before moving to the next section.

e) For added definition, lightly mist curls with a flexible hold hairspray and gently rake through with fingers when fully cooled.

Pro Tips: For a more undone, natural curl look, alternate the direction of your curls by wrapping some sections forwards and some backwards as you move through each layer of hair. Consider anchoring the curl pattern with a few flat waved sections around the face.

3. Elegant Braided Updo
Who says braids aren’t meant for wigs? This elegant updo incorporating braids is the perfect blend of sophistication and edgy charm. Rock this on-trend style by following these steps:


What You’ll Need:
– Wig with medium to long length hair
– Rat-tail comb
– Bobby pins or U-pins
– Hairspray or styling cream
– Optional: Hair accessory like jeweled pins or headband

Step-by-Step:
a) Begin by creating a deep side or middle part in the wig hair using the end of a rat-tail comb.

b) Take a small 1-2 inch section from the front hairline on either the left or right side. Apply a styling cream or wig hairspray to provide grip and hold.

c) Starting from the hairline, create a tight Dutch braid along the base of the part line. As you move towards the back, use your fingers to gently pick up and incorporate more hair into the braid as you go.

d) Once you reach just past the ear area, stop incorporating new hair and continue braiding towards the center of the back of the head. Secure the end with an elastic or bobby pin.

e) Gently backcomb the upper crown area of the remaining hair using a comb or brush to create volume and gentle texture. Then loosely gather the hair into a messy bun, tucking ends beneath and securing with pins.

f) Lightly pull apart face-framing pieces around the braided section for a tousled, romantic vibe. Complete the look by securing any loose strands and spraying all over with a flexible wig hairspray.

g) Add accessories like jeweled pins or a sparkly headband to amp up the glam factor!

Pro Tips: Get creative with different braided styles! For a boho flair, try incorporating a loose French braid. For a more sleek updo, create tight cornrow braids wrapped into a neat bun at the nape of the neck.

4. Half-Up Knotted Top Knot
This casual-cool, half-up wig style is perfect for an effortless yet chic daytime look. With a few easy techniques, you can rock the trendy top knot hairdo! Here’s how:


What You’ll Need:
– Wig with longer hair
– Texturizing or volumizing hairspray
– Comb or brush
– Hair elastics or scrunchies

Step-by-Step:
a) Start by parting the hair where desired – either a middle or off-center part will work best for this look.

b) Liberally spritz or apply a volumizing product or lightweight wig hairspray to the top half of the wig hair from the part to the crown area. Using a comb or brush, gently backcomb this top section to create lift and gentle volume.

c) On the remainder of the bottom hair, create flowy waves or curls either with a curling iron or wand, or by braiding and setting the hair overnight.

d) Gather all the teased and volumized top hair together into a messy, loose bun or knot right at the crown. Secure with a hair elastic or scrunchie.

e) Gently tug and stretch the bun or knot to create a larger, more tousled shape. Allow shorter face-framing pieces to fall free around the hairline and ears.

f) Finish with an all-over light misting of a flexible hold hairspray to lock in the style.

Pro Tips: For a slicked-back vibe, use a boar bristle brush to smooth hair into a tight knot at the crown and tame flyaways around the face with pomade or serum. Add accessories like claw clips or scarves to amp up the look.

5. Face-Framing Side Swept Waves
Want an effortlessly chic wig style that flatters any face shape? Look no further than glamorous side-swept waves! This sultry yet low-key look can be achieved by following just a few simple steps:


What You’ll Need:
– Wig with longer hair
– Volumizing or texturizing product
– Flat or straightening iron
– Rat-tail comb

Step-by-Step:
a) Begin by parting the hair deeply on one side using the pointed end of a rat-tail comb. The deeper side will create volume while the shorter side frames the face.

b) On the deeper side, liberally apply a volumizing mousse, spray or thickening tonic from the roots to the mid-lengths. Skip applying product on the shorter side.

c) Blow dry the deeper side only using a round brush, directing hair over and away from the face to create amplified volume and lift.

d) Allow the deeper side to cool, then lightly set waves or curls using a straightening or flat iron starting from the mid-lengths to ends. Bend the wefts in alternating wave patterns away from the face.

e) On the shorter side, create tousled bends using the straightening iron by gently turning the wefts inwards towards the face every 4-5 inches. This creates cascading face-framing waves.

f) Complete the look by applying a light-hold wig hairspray and finger styling any flyaways or pieces around the face.

Pro Tips: For a sleeker take on the look, use a smoothing cream or serum instead of a texturizing product and create straighter, more uniform wave patterns on both sides. Part hair towards the more angled side desired.

With these pro-styling tips and tricks in your toolkit, you’ll be able to craft gorgeous, envy-worthy wig hairstyles right at home! It just takes practice, patience and having the right wig-safe tools on hand. Don’t be afraid to experiment and get creative in finding styles that suit your vibe. Stay tuned for even more wig styling guides and tutorials coming soon!

0