Posted on Leave a comment

The Impact of Diet on Hair Health: Nourishing Your Hair from the Inside Out

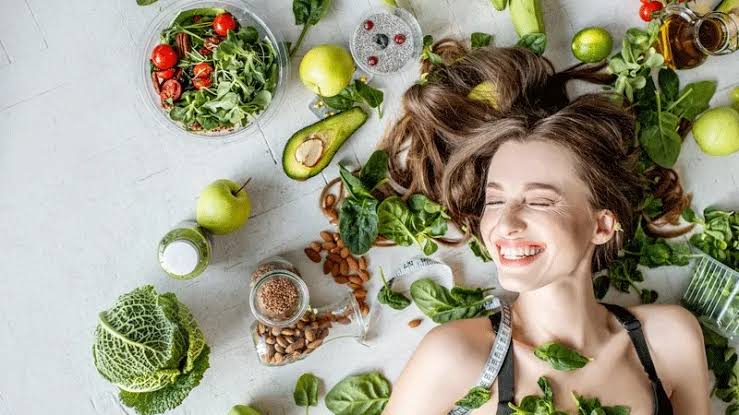
Hair health is often seen as something that can be maintained through topical products like shampoos, conditioners, and styling treatments. However, the truth is that the foundation of healthy, vibrant hair starts from within. Diet plays a crucial role in the health of your hair, and what you eat can have a profound impact on how your hair grows, how shiny it looks, and how resilient it is against damage. In this blog, we will explore how various nutrients affect hair health, the best foods to include in your diet for luscious locks, and tips for making sure your hair gets the nutrition it needs to thrive.

Understanding the Connection

Between Diet and Hair Health
Our hair is made up of a protein called keratin, and the nutrients we consume are essential in promoting keratin production. When our diet is lacking in the right vitamins and minerals, it can result in thinning, dull, or even damaged hair. Certain deficiencies, particularly in vitamins like biotin, Vitamin D, Vitamin E, and iron, can cause hair loss, slow growth, or weak strands that are prone to breakage.

Before diving into specific foods, it’s essential to understand the role of key nutrients that contribute to hair health:

Protein: Since hair is primarily made up of protein, consuming an adequate amount is essential for strong hair growth. Without enough protein, hair may become weak and brittle.

Iron: Iron helps carry oxygen to the hair follicles, which is crucial for hair growth. Low iron levels can lead to hair loss.

Vitamins: Vitamins such as Vitamin A, Vitamin C, and B vitamins (especially biotin) support hair growth and maintain the health of hair follicles.

Minerals: Zinc, magnesium, and selenium are important for overall hair health, influencing everything from hair structure to the growth cycle.

Healthy Fats: Omega-3 fatty acids, found in foods like fish and flaxseeds, help nourish hair follicles and promote scalp health.

By maintaining a balanced diet that includes these vital nutrients, you’re helping your hair stay healthy, shiny, and strong.

Foods That Promote Healthy Hair

Here are some foods that you should consider adding to your diet for optimal hair health:

1. Fatty Fish (Salmon, Mackerel, Sardines)
Fatty fish is rich in Omega-3 fatty acids, which are essential for healthy hair. Omega-3s nourish hair follicles and support the scalp, keeping hair strong and preventing dryness. These healthy fats are also vital for keeping hair hydrated and promoting its natural shine.

2. Eggs
Eggs are packed with protein, which is crucial for hair growth. They also contain biotin, a B-vitamin that strengthens hair, prevents hair loss, and helps maintain its natural color. The high protein content in eggs ensures that your hair has the building blocks it needs to stay strong and healthy.

3. Spinach and Leafy Greens
Spinach, kale, and other leafy greens are rich in iron, folate, and vitamins A and C, which are essential for hair growth. Iron helps red blood cells carry oxygen to hair follicles, promoting healthy growth. Vitamin A is important for the production of sebum, a natural oil that keeps the scalp and hair hydrated.

4. Nuts and Seeds (Almonds, Walnuts, Flaxseeds)
Nuts and seeds are loaded with vitamins, minerals, and healthy fats that support hair growth. For instance, walnuts are rich in Omega-3s, while almonds contain vitamin E, which protects the hair from oxidative stress. Flaxseeds, rich in Omega-3 fatty acids and antioxidants, can boost scalp health and hair growth.

5. Sweet Potatoes
Sweet potatoes are an excellent source of beta-carotene, which the body converts into Vitamin A. Vitamin A supports the production of sebum, which keeps hair moisturized. It also promotes healthy scalp cells, encouraging proper hair growth.

6. Avocados
Avocados are rich in healthy fats, particularly monounsaturated fat, which helps nourish the scalp and strengthen hair. They also contain Vitamin E, which helps protect the hair from oxidative stress and supports healthy hair growth.

7. Berries (Strawberries, Blueberries, Blackberries)
Berries are rich in antioxidants, particularly Vitamin C, which is vital for collagen production. Collagen helps to strengthen the hair and prevent it from becoming brittle. Vitamin C also helps the body absorb iron, which is another essential nutrient for hair health.

8. Carrots
Carrots are high in beta-carotene, an antioxidant that supports scalp health and aids in the production of sebum. They also contain a variety of B-vitamins, which help maintain healthy hair follicles and promote growth.

Foods to Avoid for Healthier Hair

While some foods can boost hair health, others may have the opposite effect. Here are a few foods to limit or avoid:
Sugary Foods: High sugar intake can lead to inflammation, which may disrupt hair growth.

Processed Foods: Fast foods and processed snacks often contain unhealthy fats and preservatives that can weaken hair over time.

Alcohol: Excessive alcohol can lead to dehydration, which affects hair health, causing dryness and brittleness.

Refined Carbs: Foods like white bread and pasta, which are high in refined carbs, can cause an imbalance in insulin levels, leading to hair thinning.

Supplements for Hair Health

While a balanced diet should be your primary focus, certain supplements can also help fill nutritional gaps that might be affecting your hair.
Some supplements to consider include:

Biotin: A popular supplement for hair health, biotin helps improve hair strength and thickness.

Vitamin D: Low levels of Vitamin D have been linked to hair loss, so supplementing with it can help promote healthier growth.

Iron: If you’re deficient in iron, an iron supplement can help prevent hair loss.

Zinc: Zinc is crucial for hair tissue growth and repair. It also helps keep the oil glands around hair follicles working properly.

Lifestyle Tips for Healthy Hair

Diet is just one aspect of hair health. Here are some lifestyle tips that can further improve the condition of your hair:

Stay Hydrated: Drinking enough water is essential for maintaining hydrated hair and a healthy scalp.

Avoid Excessive Heat: Heat styling tools can damage hair, so try to minimize their use and always apply a heat protectant.

Scalp Care: Regular scalp massages and using products that balance your scalp’s oil levels can improve circulation and promote hair growth.

Exercise: Regular physical activity can help improve circulation, bringing more oxygen and nutrients to the hair follicles.

Your hair’s health is a reflection of your overall well-being, and a nutrient-rich diet is the foundation for vibrant, strong hair. By incorporating foods rich in vitamins, minerals, and healthy fats into your daily routine, you’re providing your hair with the best chance to thrive. Additionally, adopting a holistic approach to self-care—such as staying hydrated, exercising, and avoiding harsh treatments—will further enhance the results.

When you nourish your body with the right foods, you’ll not only improve your hair health but your overall health too. So, the next time you reach for a snack or plan your meals, remember that your hair is a part of the equation, and a healthy diet is the key to achieving the beautiful, healthy locks you’ve always wanted.

The Importance of Diet in Hair Health:

While many people focus on external factors like hair products and styling techniques, the most significant factor in maintaining healthy, strong hair may lie within—specifically in your diet. The nutrients you consume provide the building blocks your hair needs to grow, shine, and stay resilient. Just as a well-balanced diet supports your overall health, it plays a crucial role in nourishing your hair from the inside out.

This section delves into the importance of diet in hair health and why a nutrient-rich diet can make all the difference in the appearance and strength of your hair.

1. Healthy Hair Starts at the Root
Hair is primarily made up of a protein called keratin. The production of keratin is directly influenced by the nutrients your body receives from the food you eat. If your diet is lacking in certain vitamins and minerals, it can lead to weak, brittle hair or even hair loss. On the other hand, a diet rich in the right nutrients promotes hair growth, increases strength, and helps your hair stay glossy and full of life.

For example, iron, a vital mineral, ensures your hair follicles receive sufficient oxygen and nutrients, while biotin and vitamin B12 play key roles in cellular repair and regeneration. When you consume the right foods, you’re providing the essential nutrients that directly influence hair follicle health, which in turn supports healthy hair growth and strength.

2. Hair Reflects Your Overall Health
Your hair is a reflection of your body’s internal health. If you’re lacking in certain nutrients, your hair can show the first signs of deficiency. Poor nutrition can lead to hair thinning, breakage, and loss. By consuming a well-balanced diet, you’re not only improving the quality of your hair but also enhancing your overall health. Nutrient-rich foods ensure your body has the energy it needs to support various functions, including the nourishment of your hair follicles.

3. Promotes Healthy Growth and Prevents Hair Loss
Many people face the challenge of thinning hair or hair loss, which can be distressing. A deficiency in specific nutrients such as iron, zinc, or vitamin D can contribute to hair loss and stunted hair growth. By improving your diet and ensuring you’re getting the essential vitamins and minerals, you can reverse or slow down hair thinning. Nutrients like omega-3 fatty acids and vitamin C help nourish the scalp and promote healthy circulation, both of which are critical for optimal hair growth.

4. Supports Scalp Health
A healthy scalp is crucial for maintaining healthy hair. If your scalp is dry, flaky, or irritated, it can hinder the growth of new hair. Proper nutrition is key to maintaining scalp health. For instance, vitamin E, found in foods like avocados and almonds, has antioxidant properties that can help protect the scalp from oxidative damage and improve its overall health. Additionally, zinc helps regulate oil production on the scalp and supports tissue growth and repair.

5. Reduces Hair Damage and Enhances Shine
Just like your skin, your hair can become dull and lifeless when it lacks the nutrients it needs. Vitamin A helps produce sebum, a natural oil that keeps hair moisturized and adds shine. Vitamin C, an antioxidant, helps combat free radicals that can damage hair cells, and biotin strengthens hair fibers, reducing breakage and split ends. The right foods can replenish the nutrients your hair needs, helping you achieve healthy, shiny, and manageable hair.

6. Prevents Premature Graying
Premature graying is often linked to a deficiency in certain vitamins and minerals, particularly B vitamins and copper. B12 and folic acid help produce red blood cells, which in turn nourish hair follicles. Copper, which is found in nuts, seeds, and shellfish, helps produce melanin, the pigment responsible for your hair color. A diet rich in these nutrients can delay the onset of gray hair and maintain your natural hair color for longer.

7. Balances Hormones and Reduces Stress
Hormonal imbalances, often triggered by stress, can contribute to hair loss or slow growth. A nutrient-dense diet can help regulate hormones and reduce stress levels. Magnesium, for example, helps lower cortisol, a stress hormone that can disrupt hair growth cycles. Additionally, vitamin D plays a role in maintaining hormonal balance and can help prevent hair loss associated with stress or hormonal shifts.

8. The Link Between Gut Health and Hair Health
Your gut health can significantly impact your hair health. A balanced gut microbiome helps in the absorption of essential nutrients that contribute to hair growth and follicle health. Including fiber-rich foods, like fruits, vegetables, and whole grains, along with probiotic-rich foods, like yogurt and fermented vegetables, can support digestive health and, in turn, support hair health by ensuring your body can absorb the nutrients it needs efficiently.

The Power of Nutrition for Healthy Hair

Diet is one of the most overlooked but essential factors in achieving and maintaining healthy hair. By nourishing your body with the right balance of vitamins, minerals, and healthy fats, you give your hair the best chance to thrive. Eating nutrient-rich foods can prevent hair loss, promote growth, reduce damage, and give you hair that is shiny, thick, and strong.

So, the next time you’re thinking about your hair health, remember that what you eat plays a significant role. Instead of relying solely on external treatments, invest in your hair from the inside out by focusing on a well-balanced diet rich in the right nutrients.

Posted on Leave a comment

Protecting and Nourishing Your Hair In The Summer

Summer is a time for basking in the warm sun, enjoying outdoor activities, and embracing a more relaxed lifestyle. However, the hot weather, humidity, and exposure to various environmental factors can take a significant toll on your hair. From UV rays and chlorine to salt water and sweat, your locks face numerous challenges during the summer months.

To keep your hair healthy, strong, and beautiful all season long, it’s essential to adapt your hair care routine and take extra steps to protect and nourish your tresses. In this comprehensive guide, we’ll explore the best ways to shield your hair from summer damage, maintain its vitality, and promote healthy growth.

1. Understanding the Impact of Summer on Your Hair
Before diving into the specific strategies for summer hair care, it’s crucial to understand how the season can affect your locks. Some of the main culprits behind summer hair damage include:

– UV Rays: Just like your skin, your hair can suffer from sun damage. UV rays can penetrate the hair shaft, causing dryness, brittleness, and color fading.


– Humidity: High humidity levels can lead to frizz, flyaways, and an overall loss of hair structure, especially for those with naturally curly or wavy hair.

– Heat: Excessive heat from the sun or styling tools can strip your hair of its natural oils, leading to dryness, breakage, and split ends.

– Chlorine and Salt Water: Pool chemicals and ocean water can wreak havoc on your hair, causing discoloration, dryness, and damage to the hair cuticle.

2. Shielding Your Hair from the Sun
One of the most important steps in summer hair care is protecting your locks from harmful UV rays. Here are some effective strategies to minimize sun damage:

– Wear a Hat or Scarf: Covering your hair with a wide-brimmed hat, a lightweight scarf, or a bandana can help block out direct sunlight and prevent UV damage.


– Use UV-Protective Hair Products: Look for leave-in conditioners, serums, or sprays that contain UV filters. These products create a barrier on the hair shaft, shielding it from the sun’s rays.


– Avoid Peak Sun Hours: Try to stay out of the sun during the hottest part of the day, typically between 10 a.m. and 4 p.m. If you must be outdoors during these hours, seek shade whenever possible.

– Apply Sunscreen to Your Scalp: Don’t forget to protect your scalp from sun damage. Apply a lightweight, non-greasy sunscreen or a specially formulated scalp sunscreen to your part and any exposed areas of your scalp.


3. Managing Moisture Levels and Combating Frizz
Summer humidity can wreak havoc on your hair, leading to frizz, unruly textures, and an overall loss of manageability. To keep your hair hydrated and frizz-free:

– Use a Moisturizing Shampoo and Conditioner: Look for products that contain nourishing ingredients like coconut oil, shea butter, argan oil, or aloe vera to help replenish moisture and smooth the hair cuticle.

– Deep Condition Regularly: Treat your hair to a deep conditioning mask once a week to help restore hydration, strength, and elasticity. Look for masks that contain hydrating ingredients like avocado, honey, or banana.

– Embrace Leave-In Conditioners: Apply a lightweight leave-in conditioner to damp hair to help lock in moisture, detangle knots, and combat frizz throughout the day. Look for products that contain glycerin, panthenol, or natural oils.

– Use Anti-Frizz Serums or Creams: For an extra layer of frizz control, apply a small amount of an anti-frizz serum or cream to your hair, focusing on the ends and any particularly unruly areas.

– Avoid Over-Washing: Washing your hair too frequently can strip it of its natural oils, leading to dryness and frizz. Aim to wash your hair every 2-3 days, or as needed based on your hair type and activity level.

4. Protecting Your Hair from Pool Chemicals and Salt Water
Chlorine, salt water, and other pool chemicals can cause significant damage to your hair, leading to dryness, discoloration, and breakage. To minimize the impact of these harsh substances:

– Wet Your Hair Before Swimming: Saturate your hair with clean water before entering the pool or ocean. This will help minimize the amount of chlorine or salt water your hair absorbs.

– Apply a Protective Oil or Product: Coat your hair with a light layer of coconut oil, olive oil, or a specialized pre-swim hair product. This creates a barrier on the hair shaft, preventing chlorine and salt water from penetrating the cuticle.

– Wear a Swim Cap: If you’re a frequent swimmer or spend a lot of time in the pool, consider wearing a swim cap to minimize your hair’s exposure to harsh chemicals.

– Rinse Your Hair Immediately After Swimming: As soon as you exit the pool or ocean, rinse your hair thoroughly with clean water to remove any chlorine, salt, or debris.

– Use a Clarifying Shampoo: Once a week, or as needed, use a clarifying shampoo to remove any buildup of chlorine, salt, or styling products from your hair. Be sure to follow up with a deep conditioning treatment to restore moisture.

5. Gentle Styling Techniques for Summer
Summer activities and heat can lead to more frequent styling, but it’s essential to be gentle with your hair to prevent damage and breakage. Here are some tips for summer styling:

– Air Dry When Possible: Give your hair a break from heat styling tools and let it air dry whenever you can. If you must use a blow dryer, use the lowest heat setting and keep the dryer at least 6 inches away from your hair.

– Use Heat Protectants: When using heat styling tools, always apply a heat protectant product first to minimize damage. Look for products that contain silicones, which create a protective barrier on the hair shaft.

– Opt for Loose, Easy Hairstyles: Tight ponytails, buns, and braids can put stress on your hair, leading to breakage and damage. Instead, opt for loose, easy styles like soft braids, beachy waves, or messy updos.

– Embrace Your Natural Texture: Summer is the perfect time to embrace your hair’s natural texture. Whether you have straight, wavy, or curly hair, work with your natural pattern to create effortless, heat-free styles.

– Protect Your Hair While You Sleep: To prevent tangles and frizz, sleep on a silk or satin pillowcase, or tie your hair up in a loose, high bun using a soft scrunchie.

6. Nourishing Your Hair from the Inside Out
In addition to external care, the health of your hair also depends on your overall diet and hydration levels. To promote strong, healthy hair growth from the inside out:

– Eat a Balanced, Nutrient-Rich Diet: Ensure your diet includes plenty of protein, healthy fats, and vitamins A, C, and E to support hair growth and strength. Good sources include lean meats, fish, eggs, nuts, seeds, and colorful fruits and vegetables.

– Stay Hydrated: Drink plenty of water throughout the day to help keep your body and hair hydrated from within. Aim for at least 8 glasses of water per day, and more if you’re spending time outdoors or exercising.

– Consider Supplements: If you’re not getting enough nutrients from your diet, talk to your doctor about taking a hair-friendly supplement like biotin, vitamin D, or omega-3 fatty acids.

– Manage Stress Levels: High levels of stress can contribute to hair loss and damage. Practice stress-reduction techniques like meditation, deep breathing, or yoga to help keep your stress levels in check.

7. Regular Trims and Treatments for Optimal Hair Health
To keep your hair looking and feeling its best all summer long, don’t forget to schedule regular trims and treatments:

– Get Regular Trims: Trimming your hair every 6-8 weeks can help prevent split ends, maintain healthy growth, and keep your style looking fresh.

– Indulge in Salon Treatments: Treat your hair to a nourishing salon treatment, like a deep conditioning mask, a hot oil treatment, or a scalp massage. These treatments can help revitalize your locks and promote healthy growth.

– Address Any Damage Promptly: If you notice signs of damage, such as excessive dryness, breakage, or split ends, consult with your stylist to develop a plan to help restore your hair’s health. This may include more frequent trims, targeted treatments, or changes to your daily care routine.

Protecting and nourishing your hair during the summer months requires a multi-faceted approach that includes the right products, gentle techniques, and a healthy lifestyle. By following these essential tips and tailoring your routine to your hair’s unique needs, you can keep your locks looking radiant, strong, and healthy all season long.

Remember, everyone’s hair is different, so it may take some experimentation to find the perfect summer hair care routine for you. Pay attention to how your hair responds to different products and techniques, and don’t hesitate to seek advice from your stylist if you need help achieving your hair goals.

With a little extra care and attention, you can embrace the summer season with confidence, knowing that your hair is protected, nourished, and ready to shine. So go ahead and enjoy the sun, sand, and surf – your locks will thank you for it.

Posted on Leave a comment

The Battle of the Tresses: Professional Hair Treatments vs. At-Home Remedies

When it comes to keeping your locks looking luscious, you generally have two options: professional salon treatments or DIY at-home remedies. Both can help improve hair health and appearance, but there are some clear advantages to investing in pro services. Let’s take a closer look at the key benefits of relying on the experts.

Expertise You Can’t Replicate at Home One of the biggest advantages of professional hair treatments is quite simply the expertise involved. Salon stylists and technicians undergo extensive training to master skills like:

Analyzing Hair Type and Condition From dry and brittle to oily and limp, different hair types and textures require different treatment approaches. Stylists can evaluate your hair’s porosity, elasticity, density and more to determine which salon services would be most beneficial.

Proper Product and Treatment Application
Things like glosses, smoothing treatments, and restorative hair masks require precise applications and techniques to reap the full benefits. Professionals know exactly how much product to use, how to fully saturate strands, and which areas need extra attention.

Customizing Treatments
Rather than taking a one-size-fits-all approach, salon experts can customize treatments by blending different product combinations and adjusting concentrations based on your hair’s unique characteristics and desired results.

At home, it’s easy to unknowingly skip sections, over-apply product in some areas, experience uneven saturation or heat exposure, and misjudge what your hair really needs. Without professional training, at-home treatments are more hit-or-miss.

Superior Salon-Exclusive Products
Another major benefit of professional hair treatments? Access to industry-quality products not available to the general public. Professional salon brands like Aveda, Redken, Shu Uemura, and Oribe offer elite haircare lines utilizing:

Highly Concentrated, Potent Formulas
Unlike most drugstore brands formulated for the masses, professional haircare is optimized to deliver maximum repair, hydration, and nourishment. The formulas contain higher percentages of proven active ingredients.

Rare Exotic Botanical Extracts
Many salon hair treatments feature exotic, sustainably harvested botanical extracts from things like meadowfoam seed, pracaxi oils, and species of algae, delivering superior conditioning and antioxidant benefits.

Advanced Repair Technologies
Thanks to innovations like bio-ceramics, keratin capsules, and amino acid derivatives, salon-grade haircare can deeply penetrate the cuticle to rebuild and fortify strands from the inside-out.

At home, you’re limited to lower concentration over-the-counter products that treat hair more superficially with silicones and waxes coating the surface rather than restoring it comprehensively.

Services Tailored for Your Hair’s Needs
Beyond just top-notch products, salon visits provide completely customized hair treatment services based on your individual texture, density, damage levels, problem areas, and desired results. For instance:

Thick, Coarse Hair
May benefit from nourishing coconut oil masks, hydrating steamed treatments, and amino acid-rich smoothers and straighteners tailored for coarser textures.

Fine, Limp Hair
Could use volumizing blowouts, root lifters, and fillers containing cellulose and polymers to add grit and grip to silky strands.

Dry, Damaged Hair
Deep conditioning with fatty acid-rich butters and oils, reparative keratin treatments, porosity fillers, and protective gloss top coats are ideal.

Color-Treated Hair
Antioxidant glosses, demi-permanent color refreshers, and low pH chelating shampoos help extend vibrancy and prevent premature fade and brass.

This level of hyper-personalized treatment simply can’t be matched with typical rinse-out or leave-in at-home masks and DIY concoctions. The salon stylists are highly trained to identify hair needs and select the appropriate services.

A Spa-Worthy Experience
Of course, there’s also the sheer pampering element of reclining in a plush salon chair and letting professionals work their magic. Many salon treatments incorporate relaxing add-ons like:

Scalp Massages
To improve circulation and relieve tension, massages also help detangle locks while allowing treatment products to better reach follicles.

Steam Therapy
Generated by steaming towels or specialized machines, intense humid heat hydrates and helps products more deeply penetrate the hair shaft.

Hot Oil Treatments
Delivering intense nourishment and elasticity, hot oil applications involve wrapping hair in a warming cap for deeper conditioning absorption.

High-Tech Tools
Advanced salon tools like infrared heat lamps, negative ion hair dryers, and keratin-infusing flatirons help optimize treatment performance.

Rather than straining to evenly apply treatments yourself at home while bent over the tub, you can simply kick back and be enveloped in hair-rejuvenating bliss.

Long-Lasting, Transformative Results
Due to the superior formulas, meticulous application methods, and customized technologies, the results from salon hair treatments tend to both look better and last longer than typical at-home versions. You’ll likely see benefits like:

Revived Body and Movement
Silky but full of spring and volume rather than limp, lank, or frizzy.

Touchable Softness and Shine
Smooth, glossy, and luminous without strippingaway moisture.

Manageability and Curl/Sleek Definition
Curls look bouncy and defined, straight styles lay sleek and smooth.

Extended Vibrancy of Color Treatments
Pigments look truer and more radiant for longer stretches.

Essentially, professional salon treatments can comprehensively restore hair’s health and appearance in ways basic conditioning masks and quick DIY fixes simply cannot. The results create a transformative “wow” factor you can’t really duplicate at home.

The Investment Is Worth It
To be sure, salon visits and professional hair treatments do require a bigger investment than basic box dye jobs or drugstore conditioners. However, by splurging on the expertise of trained stylists and the performance of elite haircare products, you’ll reap far better, longer-lasting results than any at-home option. Your customized transformations will leave you looking like you just stepped out of the editorial pages.

So while DIY haircare treatments can provide some benefits in a pinch, there’s simply no replacement for professional salon services if your goal is maximum hair rejuvenation and red carpet-worthy locks. It’s the ultimate indulgence your strands deserve.

Posted on Leave a comment

The Benefits of Professional Makeup Application: Unveiling the Magic Behind the Perfect Look

In today’s image-conscious world, looking your best has become more important than ever. While many of us enjoy the ritual of applying our own makeup, there’s an undeniable allure to professional makeup application. From red carpet events to weddings, and even for everyday glamour, more people are turning to makeup artists to achieve that flawless, camera-ready look. But what exactly makes professional makeup application so special? Let’s delve deeper into the myriad benefits that come with putting your face in the hands of a skilled artist.


1. Expertise in Technique: The Foundation of Flawless Makeup

Professional makeup artists are true masters of their craft. They’ve spent years honing their skills, learning intricate techniques that go far beyond what most of us pick up from YouTube tutorials or magazine tips. These experts understand the nuances of:

– Color theory: Knowing how different shades interact and which ones complement various skin tones.
– Contouring and highlighting: Sculpting the face to enhance natural features and create dimension.
– Eye makeup techniques: From the perfect winged liner to intricate smoky eyes, pros know how to make eyes pop.
– Blending: The key to natural-looking makeup lies in seamless blending, a skill that takes significant practice to perfect.

Moreover, makeup artists are adept at working with different face shapes, eye shapes, and lip types. They can analyze your features and apply makeup in a way that enhances your natural beauty while minimizing any perceived flaws. This level of customization is difficult to achieve on your own, especially if you’re not trained in these techniques.

2. Knowledge of Products: The Right Tools for the Job

The world of makeup is vast and ever-changing. New products hit the market constantly, each promising miraculous results. Professional makeup artists make it their business to stay on top of these trends. They:

– Test new products extensively before incorporating them into their kits.
– Understand the chemistry behind different formulations and how they interact with various skin types.
– Know which products photograph well and which might cause flashback in photos.
– Are familiar with high-end, drugstore, and professional-grade products, allowing them to choose the best options for each client and situation.

This extensive product knowledge ensures that the makeup not only looks stunning but also performs well throughout its wear time. Whether you need your makeup to last through a long wedding day or withstand the heat of stage lights, a professional knows exactly which products to use.

3. Customized Approach: Your Unique Beauty, Enhanced

One of the most significant advantages of professional makeup application is the personalized approach. Unlike following a one-size-fits-all tutorial, a makeup artist will:

– Analyze your skin type and address any concerns (dryness, oiliness, sensitivity, etc.).
– Consider your natural coloring to choose complementary shades.
– Take into account the occasion and lighting conditions where you’ll be wearing the makeup.
– Listen to your preferences and incorporate them into the final look.
– Adapt their technique to suit your personal style, whether you prefer a natural look or full glam.

This bespoke service ensures that your makeup enhances your unique features rather than masking them or making you look like someone else entirely.

4. Time-Saving: Efficiency Meets Expertise

In our fast-paced world, time is a precious commodity. While applying your own makeup can be a relaxing ritual, it can also be time-consuming, especially if you’re aiming for a more complex look. Professional makeup artists can typically achieve in 45-60 minutes what might take an amateur several hours. This efficiency comes from:

– Having all the necessary tools and products at hand.
– Knowing exactly which techniques to use for the desired effect.
– Working quickly without sacrificing quality.
– Multitasking, such as allowing one product to set while working on another area of the face.

For busy professionals, brides-to-be, or anyone with a packed schedule, this time-saving aspect can be invaluable.

5. Long-Lasting Results: Makeup That Goes the Distance

One of the most frustrating aspects of doing your own makeup is watching it fade, crease, or smudge as the day wears on. Professional makeup artists have tricks up their sleeves to ensure your look lasts:

– Proper skin preparation: They know how to prep your skin to create the perfect canvas for long-lasting makeup.
– Use of primers: Selecting and applying the right primers for face, eyes, and lips to increase makeup longevity.
– Setting techniques: From powders to setting sprays, pros know how to lock your look in place.
– Layering products: Building coverage and color in thin layers for a more durable finish.

These techniques mean you can confidently face long days, photo sessions, or special events without worrying about touch-ups.

6. Stress Reduction: Beauty Without the Burden

Special occasions often come with their own set of stressors. Whether it’s your wedding day, a critical job interview, or a major social event, the last thing you need is to worry about your makeup. Professional application offers:

– Peace of mind knowing you’ll look your best.
– A relaxing experience where you can sit back and be pampered.
– Confidence that your makeup will hold up under various conditions (tears, sweat, etc.).
– One less thing to worry about on an already busy day.

This reduction in stress can have a positive impact on your overall experience and enjoyment of the event.

7. Learning Opportunity: Expand Your Beauty Knowledge

Getting your makeup done professionally isn’t just about the end result; it can also be an educational experience. Many makeup artists are happy to share their knowledge:

– They can explain why they’re choosing certain products or techniques for your skin.
– You can learn new application methods that you might not have discovered on your own.
– Artists often share tips on how to maintain and care for your skin between makeup applications.
– You may discover new products or tools that you’ll want to incorporate into your own routine.

This knowledge-sharing aspect can help you improve your own makeup skills and make more informed choices about your beauty routine.

8. Confidence Boost: Look Good, Feel Great

There’s undeniable truth to the saying, “When you look good, you feel good.” Professional makeup application can significantly boost your confidence by:

– Enhancing your best features.
– Helping you see yourself in a new light.
– Ensuring you’re putting your best face forward for important occasions.
– Giving you a polished, put-together look that can positively impact your mood and behavior.

This confidence boost can be particularly beneficial for photoshoots, performances, or any situation where you need to be at your best.

9. Access to Professional-Grade Products: Beauty’s Best-Kept Secrets

Makeup artists often have access to professional-grade products that aren’t available in regular stores. These products are typically:

– Higher in pigment concentration for better color payoff.
– More durable and long-lasting than consumer brands.
– Designed to perform well under various lighting conditions.
– Often more hygienic, with packaging designed for professional use.

Experiencing these products can open your eyes to a whole new world of makeup possibilities.

10. Objective Perspective: Fresh Eyes for a Fresh Look

We all have our comfort zones when it comes to makeup, but sometimes these can turn into ruts. A professional makeup artist provides:

– An objective view of your features and coloring.
– Fresh ideas for colors and techniques you might not have considered.
– The ability to see past your perceived flaws and enhance your natural beauty.
– Suggestions for updating your look in ways you might not have thought of.

This outside perspective can be refreshing and may inspire you to try new things with your own makeup routine.

11. Photoshoot and Special Event Readiness

For occasions where you’ll be heavily photographed or filmed, professional makeup is almost essential. Makeup artists understand:

– How different lighting conditions affect makeup appearance.
– Which products and techniques photograph best.
– How to create looks that translate well both in person and on camera.
– The importance of makeup that looks good from all angles.

This expertise is particularly valuable for weddings, professional headshots, television appearances, and other high-stakes visual events.

12. Skin-Friendly Application

Professional makeup artists are typically well-versed in skincare as well as makeup. This means:

– They can choose products that won’t irritate your skin or clog pores.
– The application process is often gentler and more hygienic than doing it yourself.
– They can advise on how to remove the makeup properly to minimize skin stress.
– Many use high-quality, skin-nourishing products that can actually benefit your complexion.

This attention to skin health means you can enjoy beautiful makeup without compromising your skin’s wellbeing.

Professional makeup application is more than just putting on some lipstick and mascara. It’s a comprehensive service that combines artistry, technical skill, product knowledge, and personalized care. While it may seem like a luxury, the benefits of professional makeup can far outweigh the cost, especially for special occasions or situations where looking your absolute best is crucial.

Whether you’re a bride wanting to look timeless in your wedding photos, a professional needing to make a strong first impression, or simply someone who wants to treat themselves to expert beauty care, professional makeup application offers a unique blend of benefits that can enhance not just your appearance, but also your confidence and overall experience.

In a world where image often matters, putting your face in the hands of a skilled professional can be a wise investment in yourself. So the next time you have a special event or just want to feel extra fabulous, consider booking a session with a professional makeup artist. You might be surprised at the transformation – not just in how you look, but in how you feel.

Posted on Leave a comment

Seasonal Wig Care Tips: A Comprehensive Guide to Maintaining Your Wigs in Every Weather Condition

Wigs have become an integral part of many people’s lives, serving various purposes from fashion statements to medical necessities. Whether you’re a long-time wig wearer or new to the world of alternative hair, understanding how to care for your wigs throughout the changing seasons is crucial for maintaining their quality, appearance, and longevity. Each season brings unique challenges that can affect your wig’s performance and aesthetic appeal. In this comprehensive guide, we’ll delve deep into the intricacies of wig care across all four seasons, providing you with expert tips, tricks, and recommendations to ensure your wigs look their best year-round.


Spring: Embracing Renewal and Combating Humidity

As nature awakens from its winter slumber, spring brings a sense of renewal – but also increased humidity and unpredictable weather patterns. Here’s how to keep your wigs looking fresh and fabulous during this season of growth:

1. Invest in a High-Quality Wig Stand
A proper wig stand is not just a storage solution; it’s a vital tool for maintaining your wig’s shape and allowing air circulation. In spring, when humidity levels start to rise, air flow becomes even more critical to prevent moisture buildup and potential mildew growth.

– Choose a stand with a wide base for stability
– Opt for stands made of breathable materials like canvas or mesh
– Consider a collapsible stand for travel during spring vacations

2. Master Humidity Control
Spring’s increasing humidity can wreak havoc on both synthetic and human hair wigs, causing frizz and loss of style. Combat these effects with these techniques:

– Use a leave-in conditioner specifically formulated for wigs
– Apply anti-humidity sprays designed for your wig type
– Experiment with texturizing products to embrace and control natural-looking volume

3. Embrace Protective Styling
On particularly humid days, consider styling your wig in ways that minimize exposure to moisture:

– Try elegant updos like chignons or braided styles
– Experiment with half-up, half-down looks to control the most susceptible parts of the wig
– Use wig-safe accessories like decorative clips or headbands to keep styles in place

4. Implement a Spring Cleaning Routine
With increased outdoor activities and temperature fluctuations, your wig may require more frequent cleaning:

– Wash human hair wigs every 7-10 wears, or when they begin to feel heavy or look dull
– Clean synthetic wigs every 4-6 wears, or after exposure to strong odors or pollutants
– Use cool to lukewarm water and specialized wig shampoos and conditioners
– Allow wigs to air dry completely before styling or storing

5. Prepare for April Showers
Spring rain can catch you off guard, potentially damaging your wig. Stay prepared with these tips:

– Carry a compact, foldable umbrella in your bag at all times
– Invest in a stylish rain hat or water-resistant hood
– If your wig does get wet, gently blot (don’t rub) with a microfiber towel and allow it to air dry on a wig stand

Summer: Beating the Heat and Preserving Your Wig’s Vitality

Summer presents a unique set of challenges for wig wearers, from scorching temperatures to increased sun exposure and water activities. Here’s how to keep your wig – and yourself – cool and comfortable during the hottest months:

1. Choose Summer-Friendly Wig Styles
Opt for wig styles that are more manageable in hot weather:

– Short to medium-length cuts that keep your neck cool
– Wigs with less volume to reduce heat retention
– Styles with built-in parts or lace fronts for a more breathable fit
– Lighter colors that reflect sunlight and heat (but be cautious of potential fading)

2. Protect Against UV Damage
Sun exposure can fade and damage wig fibers, especially in color-treated human hair wigs:

– Apply a UV protectant spray designed for wigs before sun exposure
– Wear wide-brimmed hats or use parasols for added protection
– Store wigs away from direct sunlight when not in use
– Consider purchasing a designated “summer wig” in a slightly lighter shade to account for natural sun-lightening effects

3. Master Summer Wig Hygiene
Increased sweating and outdoor activities mean your wig may need extra attention:

– Use wig caps made from moisture-wicking materials like bamboo or microfiber
– Change your wig cap daily, or more frequently during intense heat
– Wash your wig more often – every 5-7 wears for human hair, 3-5 wears for synthetic
– Use a clarifying shampoo once a month to remove product buildup and sweat residue

4. Navigate Water Activities
Summer often involves pools, beaches, and water parks. Here’s how to protect your wig:

– Consider purchasing a designated swim wig or water-friendly synthetic wig
– If wearing your regular wig, apply a leave-in conditioner before swimming to create a protective barrier
– Rinse your wig thoroughly with cool, clean water immediately after exposure to chlorine or saltwater
– Use a deep conditioning treatment after swimming to restore moisture

5. Combat Frizz and Flyaways
Heat and humidity can cause frizz in both human hair and synthetic wigs:

– Use a wig-safe anti-frizz serum, focusing on the ends and any problem areas
– Try a light-hold hairspray to tame flyaways
– Consider having your human hair wig professionally treated with a keratin smoothing treatment

6. Embrace Alternative Cooling Methods
Stay comfortable without compromising your look:

– Use cooling sprays or mists designed for scalp relief under wigs
– Freeze your wig cap for a few minutes before wearing for a refreshing sensation
– Experiment with wig grips or cap liners that provide an extra barrier between your scalp and the wig

Fall: Transitioning to Cooler Weather with Grace

As summer fades into fall, the changing weather requires adjustments to your wig care routine. Here’s how to keep your wigs looking fabulous as the leaves change color:

1. Combat Dryness
The drop in humidity can lead to dryness in both human hair and synthetic wigs:

– Incorporate weekly deep conditioning treatments for human hair wigs
– Use leave-in conditioners and wig-safe oils to maintain moisture
– Consider using a humidifier in your home to prevent excessive drying

2. Address Static Electricity
As the air becomes drier, static can become a major issue:

– Use wig-safe anti-static sprays before styling
– Lightly run a dryer sheet over your wig to reduce static cling
– Invest in wooden or natural bristle brushes, which are less likely to create static than plastic ones

3. Protect Against Wind Damage
Fall breezes can quickly tangle and matt your wig:

– Style your wig in wind-resistant looks like low buns or braids on blustery days
– Use stylish scarves or hats to keep your wig secure in strong winds
– Carry a small wig brush or comb for quick touch-ups throughout the day

4. Adjust Your Color Palette
Fall is the perfect time to experiment with richer, warmer hair colors:

– Consider adding lowlights or transitioning to deeper shades
– Try ombré or balayage effects that blend summer lightness with autumnal tones
– Use color-depositing conditioners to refresh and deepen your wig’s hue

5. Prepare for Temperature Fluctuations
Fall often brings unpredictable weather patterns:

– Layer your outfits to avoid overheating, which can cause excessive sweating under your wig
– Allow your wig to adjust gradually when moving between outdoor cold and indoor heat
– Consider alternating between lighter and heavier wigs depending on the day’s forecast

Winter: Combating Cold, Dryness, and Static

Winter can be the harshest season for wigs, with cold temperatures, dry air, and static electricity posing significant challenges. Here’s how to protect your wigs during the frosty months:

1. Moisturize, Moisturize, Moisturize
Combating winter dryness is crucial for maintaining wig health:

– Use leave-in conditioners and wig-safe oils more frequently
– For human hair wigs, consider overnight deep conditioning treatments
– Invest in a good quality humidifier for your home and office

2. Master Static Control
Static electricity can be a constant battle in winter:

– Use fabric softener sheets to gently remove static (rub lightly over the wig)
– Invest in anti-static wig sprays and apply before going outdoors
– Consider using ionic brushes, which can help reduce static buildup

3. Protect Against Harsh Weather
Winter elements can be particularly damaging to wigs:

– Wear hats, beanies, or earmuffs over your wig in extreme cold
– Choose hat liners made of silk or satin to reduce friction
– If your wig gets wet from snow, gently blot with a towel and allow to air dry completely

4. Adjust Your Washing Routine
Over-washing can strip essential moisture from your wig in winter:

– Extend the time between washes by using dry shampoo
– When washing, use lukewarm (not hot) water to prevent further drying
– Always use sulfate-free, moisturizing shampoos and conditioners

5. Embrace Winter-Friendly Styles
Certain styles can help protect your wig and keep you warm:

– Try fuller, more voluminous styles that provide insulation
– Experiment with braided styles that are less prone to tangling in winter winds
– Consider purchasing a slightly darker wig for winter to complement the season and hide any fading

6. Care for Your Scalp
A healthy scalp means a better foundation for your wig:

– Use moisturizing scalp treatments to combat dryness and flaking
– Consider silk or satin wig caps to reduce friction and retain moisture
– Take breaks from wig-wearing when possible to allow your scalp to breathe

Year-Round Wig Care Essentials

Regardless of the season, some wig care practices remain constant:

1. Proper Brushing and Detangling
– Always use a wide-tooth comb or specialized wig brush
– Start detangling from the ends, working your way up to the roots
– Be extra gentle with wet wigs, as they are more prone to damage

2. Rotation and Rest
– If possible, alternate between multiple wigs to extend their lifespan
– Allow each wig at least 24 hours of “rest” between wears
– Use this time to reshape and air out your wigs on proper stands

3. Professional Maintenance
– Have human hair wigs trimmed every 6-8 weeks to prevent split ends
– Consider professional color touch-ups or treatments every 3-4 months
– Have synthetic wigs professionally steamed or reset when they lose their style

4. Proper Storage
– Store wigs on stands or in boxes away from direct sunlight and heat sources
– Use breathable storage options to prevent moisture buildup
– Consider using silica gel packets in storage areas to absorb excess moisture

5. Quality Products
– Invest in high-quality, wig-specific products for all your care needs
– Avoid using regular hair products, which can be too harsh for wigs
– Keep a variety of styling products on hand to adapt to changing weather conditions

6. Regular Inspections
– Check your wigs regularly for signs of wear, such as thinning or excessive shedding
– Address any issues promptly to prevent further damage
– Know when it’s time to retire a wig and invest in a replacement

Caring for your wigs throughout the changing seasons requires attention, dedication, and the right knowledge. By following these comprehensive guidelines, you can ensure that your wig collection remains beautiful, comfortable, and long-lasting regardless of what Mother Nature throws your way. Remember that different wig types and personal preferences may require slight variations in care routines, so don’t be afraid to experiment and find what works best for you. With proper care and maintenance, your wigs will continue to boost your confidence and style in every season, year after year.

Posted on Leave a comment

PRODUCTS TO TAME FLYAWAYS ON HUMAN HAIR WIGS

Let’s get to it:

Flyaways can be a persistent issue with human hair wigs, but fear not! We’ve curated a detailed guide on combatting these pesky strands using specialized anti-frizz products.

Let’s delve into the world of haircare excellence:

1. Anti-Frizz Serum:
A lightweight anti-frizz serum like John Frieda Frizz Ease Extra Strength Serum can be applied to the wig to tame flyaways and add shine.


2. Anti-Frizz Oil:
Use an anti-frizz oil like Moroccanoil Treatment to smooth out the hair and reduce frizz. Apply a small amount to your hands and run them through the problematic areas.


3. Anti-Frizz Cream:
Opt for an anti-frizz cream designed specifically for human hair wigs like Living Proof No Frizz Nourishing Styling Cream. This can help control flyaways and keep the wig looking polished.


4. Leave-In Conditioner with Anti-Frizz Properties:
Choose a leave-in conditioner like Aveda Smooth Infusion Smoothing Masque that specifically addresses frizz concerns. Apply it to the wig to keep the hair hydrated and smooth.


Selecting the right anti-frizz product is key to maintaining the integrity of your human hair wig. Before making a choice, ensure compatibility and follow usage instructions diligently. Armed with these products, bid farewell to flyaways and welcome a wig that exudes perfection. Your hair’s best days are just a product away.

Posted on Leave a comment

Hair Masks And How To Use Them

If you’re struggling with severely damaged, dry, or dehydrated hair, your regular conditioner might fall short in providing the necessary moisture and nourishment. This signals the need to revamp your hair care routine with a more hydrating approach, incorporating a weekly repairing hair mask treatment.

Just like any hair care product, using a hair mask requires specific steps to reap its full benefits. While you may already include a hair mask in your routine, you might not be entirely familiar with the correct application method. We’ll address common hair mask queries, recommend hair-loving products, and offer a step-by-step tutorial on the proper way to apply a hair mask.

What Is a Hair Mask

Similar to how face masks nourish and hydrate your skin, hair masks perform the same function for your strands. Hair masks, also known as deep conditioners, are intensive moisturizing treatments typically incorporated into a hair care routine post-shampooing and before conditioning. You might question the distinction between a hair mask and a conditioner, which primarily lies in consistency and potency.

While conditioners hydrate hair, hair masks contain higher concentrations of potent ingredients and are left on the hair for a longer duration to provide a deeper treatment. Additionally, hair masks tend to have a thicker texture compared to lightweight conditioners, which are easily rinsed out. Available in various formulas catering to different hair needs, hair masks range from deep purple formulas for addressing brassiness to clay formulas for oil control and creamy masks for optimal hydration.

Why Should You Use a Hair Mask?

Hair masks offer numerous advantages for various hair types and are essential components of any hair care regimen. Tailor the frequency of use based on the extent of damage, whether it’s weekly or even daily. Just as you select specific skincare products for your skin type, opt for the appropriate hair mask suited to your hair type. This approach yields hydrated, softer-feeling hair, as the mask works to deeply repair and nourish from the inside out.

Should You Apply A Hair Mask On Wet Or Dry Hair?

Typically, it’s recommended to apply hair masks on damp or wet hair. Wet hair is more porous, allowing it to better absorb the nutrients from the mask, making it the preferred base for application. However, if you’re using an oil-based mask, such as coconut oil, you can apply it to dry hair. Water and oil repel each other, so an oil-based mask may not fully penetrate the hair shaft if applied to wet strands. Ultimately, it’s advisable to adhere to the instructions provided with the chosen mask.

Should You Use a Hair Mask Before Or After Shampooing?

Hair masks are ideally applied to freshly washed hair to allow for better penetration into the strands and scalp. It’s important to review the instructions provided with your specific product to determine its recommended usage and whether it’s suitable for application to the scalp. Many popular hair masks are part of a hair treatment system, typically including a matching shampoo and conditioner, for a comprehensive regimen. Alternatively, if not part of a set, consider using a sulfate-free shampoo suitable for all hair types, such as L’Oréal Paris Sulfate Free Simply Clean Shampoo with Essential Oil, which effectively cleanses without stripping the hair, thus minimizing potential damage.


How to Correctly Apply a Hair Mask

It’s important to adhere to the instructions provided with the particular hair care product you’re using. However, for optimal results, there’s a detailed application method to consider.

Now, delving into the technical steps of applying a hair mask, we’ve outlined a step-by-step guide below to help you provide your strands with the care and attention they deserve.

1. Assess Your Hair’s Needs First

The primary purpose of using a hair mask is to target specific hair concerns you may have, therefore, ensure you select a mask that aligns with those needs.

Hair Mask for Dry, Damaged Hair

For dry, split ends, or brittle hair, opt for a hydrating and repairing mask such as the Briogeo Don’t Despair, Repair! Deep Conditioning Hair Mask. It nourishes and rejuvenates weak, damaged, and tangled hair prone to split ends.


Hair Mask for Color-Treated Hair

To maintain hydration for color-treated hair without compromising its vibrancy, consider using a specialized hair mask that nourishes while safeguarding your color investment. An excellent choice is the FEKKAI Shea Butter Intense Mask, it replenishes lost moisture, enhances shine, and smooths hair texture, all while preserving your color’s vitality.


Hair Mask for Blonde/Silver Hair

If you’re experiencing brassy undertones in your blonde or silver hair, consider employing a potent anti-brass solution such as the L’Oréal Paris EverPure Sulfate-Free Anti Brass Purple Mask Treatment. This targeted treatment effectively combats brassiness in bleached hair, neutralizing unwanted yellow tones while providing nourishment to the strands.

2. Give Your Hair a Deep Clean

Before shampooing your hair, refer to the instructions provided with the hair mask to determine if shampooing beforehand is recommended. If you’re utilizing any of the aforementioned masks, begin by cleansing your hair thoroughly with a shampoo tailored to your hair type and concerns. A common error when using hair masks is applying them to dirty or oily strands. To prevent this, ensure your hair is clean by washing it beforehand.

3. Saturate Your Strands

To ensure optimal results from your hair mask, evenly distribute a generous amount of product from the mid-lengths to the ends of your hair, avoiding the roots unless directed otherwise by your chosen hair mask. For individuals with thick or curly hair, consider dividing your hair into four sections to ensure thorough saturation. Remember, avoid applying the mask to hair that is excessively wet, as this can dilute its effectiveness. Prior to application, gently squeeze out excess water from your hair.

4. Let the Hair Mask Sit for the Allotted Time

While conditioner typically requires only a few minutes of application, certain hair masks may necessitate a longer duration, ranging from five to twenty minutes or even more, depending on the product. Always adhere to the instructions provided with the mask. Most of the masks mentioned earlier require a maximum of five to eight minutes to reap all the benefits.
Rinsing out a hair mask prematurely means your hair may not fully benefit from its nourishing properties. Conversely, leaving a mask on for too long can lead to greasiness or limpness. Certain hair types, such as curly, coily, or chemically-treated hair prone to dryness, may benefit from leaving a mask on overnight. However, it’s essential to consult the directions and ingredients of your specific mask, as moisturizing treatments can be effective overnight, while protein-based masks may weigh hair down if left in for an extended period.

5. Rinse With Warm Water

Unless specified otherwise on the packaging, it’s advisable to rinse the hair mask with lukewarm water after the recommended duration, similar to rinsing out conditioner. Ensure thorough rinsing to prevent product buildup near the scalp and to avoid the appearance of greasiness on the lengths. After showering, wrap your hair in a microfiber towel or apply a heat protectant before blow-drying. The frequency of using a hair mask can vary, ranging from once a week for products left on for 20 minutes or longer, to daily use, depending on the product’s instructions.

Posted on Leave a comment

The Ultimate Guide to Silk Press vs Flat Iron: Achieving Sleek Straight Hair Safely

Achieving Sleek Straight Hair Safely

For naturalistas seeking sleek, straight styles, two popular techniques reign supreme: the silk press and the traditional flat iron. Both methods promise to temporarily tame your curls and coils, but they differ significantly in their approach, results, and potential impact on your hair’s health. In this comprehensive guide, we’ll dive deep into the intricacies of each method, exploring the pros and cons in detail to help you make an informed decision that aligns with your hair goals, lifestyle, and overall hair health.


The Silk Press: A Gentle Path to Straight Hair Bliss

The silk press is a specialized technique that involves meticulously straightening your hair with a unique silk press comb and a moderate amount of heat. Here’s an in-depth look at the pros and cons of this coveted method:

Pros:

1. Reduced Heat Damage: Unlike flat ironing, the silk press uses lower heat settings, typically between 300°F and 350°F, which minimizes the risk of heat damage and protects the integrity of your strands. The silk press comb also helps distribute the heat evenly, preventing hot spots that can lead to breakage.

2. Longer-Lasting Results: With proper maintenance, a silk press can last anywhere from two to four weeks, making it a more long-term straightening solution compared to flat ironing. This longevity means you won’t need to re-straighten as frequently, reducing overall heat exposure.

3. Silky Smooth Finish: The silk press comb glides seamlessly through your hair, creating a smooth, silky finish that mimics the look and feel of naturally straight hair without the excessive dryness or frizziness that can occur with flat ironing.

4. Versatility: After a silk press, you can wear your hair bone-straight, or you can opt for loose waves or curls, giving you more styling options and versatility. This versatility allows you to switch up your look without having to completely re-straighten your hair.

5. Minimal Shedding and Breakage: The gentle tension and heat distribution of the silk press comb reduce excessive shedding and breakage, common issues associated with traditional flat ironing.

6. Suitable for All Hair Types: The silk press technique can be tailored to suit various hair types, from fine and delicate strands to coarse and resilient textures, making it an inclusive option for diverse hair needs.

Cons:

1. Time-Consuming Process: A silk press is a multi-step process that can take several hours, especially for those with longer or thicker hair. It typically involves a thorough blowout, followed by meticulous flat ironing with the silk press comb. This time commitment may not be feasible for those with busy schedules or limited salon access.

2. Potential for Dryness: While less damaging than flat ironing, the silk press method can still cause dryness and breakage if not done correctly or if your hair is already in a compromised state. Proper moisturization and deep conditioning are essential before and after the process.

3. Maintenance Required: To prolong the silk press, you’ll need to wrap your hair at night, avoid excessive manipulation, and potentially use silk or satin pillowcases and scarves to minimize friction and frizz. This extra maintenance may not suit those with an active lifestyle or who prefer low-maintenance hairstyles.

4. Professional Experience Required: While it’s possible to do a silk press at home, the technique is intricate and may require professional experience or training to achieve optimal results without causing damage. Improper application can lead to uneven straightening, missed sections, or excessive heat exposure.

5. Expense: A professional silk press service at a salon can be costly, ranging from $50 to $200 or more, depending on your location, stylist, and hair length and density. This investment may not be feasible for those on a tight budget or who prefer to style their hair at home.

The Flat Iron: A Quick Fix for Straight Hair

Flat ironing, on the other hand, is a more traditional and widely accessible method for straightening natural hair. Here’s an in-depth look at the key pros and cons:


Pros:

1. Convenience: Flat ironing is a relatively quick and easy process, making it a go-to option for those with busy lifestyles or who want a temporary straight look for a special occasion. The simplicity of this method allows for more spontaneity and flexibility.

2. Versatility: You can flat iron your entire head or just a few sections for a sleek, polished look, allowing for more styling flexibility. This versatility makes flat ironing a great option for those who prefer to switch between straight and curly styles frequently.

3. Cost-Effective: Flat ironing requires fewer specialized products and tools compared to a silk press, making it a more budget-friendly option, especially for at-home styling.

4. Customizable Heat Settings: Most flat irons have adjustable heat settings, allowing you to tailor the temperature to your hair type and desired results, whether you prefer a bone-straight look or loose waves.

5. Accessibility: Flat irons are widely available and can be purchased at various price points, making this straightening method accessible to a broad range of individuals, regardless of their budget or location.

Cons:

1. Increased Heat Damage: Traditional flat ironing often involves higher heat settings, typically ranging from 400°F to 450°F or higher, which can lead to significant heat damage, breakage, dryness, and split ends over time, especially if not done correctly or if your hair is already in a fragile state.

2. Short-Lived Results: The effects of flat ironing can last anywhere from a few days to a week, depending on your hair’s texture, the products used, and how well you maintain the style. This means you may need to flat iron more frequently to maintain a straight look, increasing overall heat exposure.

3. Potential for Frizz and Reversion: Flat ironing can leave your hair prone to frizz and reversion, especially in humid or rainy conditions, which can compromise the sleek, straight look you’re aiming for.

4. Uneven Results: Achieving a consistent, sleek finish with a flat iron can be challenging, especially for those with thicker or coarser hair textures. Uneven straightening or missed sections can result in an unprofessional or unpolished look.

5. Potential for Excessive Shedding and Breakage: The combination of high heat and tension from flat ironing can lead to excessive shedding and breakage, especially if your hair is already fragile or if you don’t use proper heat protectants and techniques.

6. Limited Longevity: Since flat ironing only provides a temporary straight style, you may need to repeat the process more frequently, increasing the overall time and effort required to maintain your desired look.

Choosing the Right Method for Your Hair Needs

When it comes to choosing between a silk press and flat ironing, it ultimately comes down to your hair’s health, your desired duration of the straight look, your styling preferences, your lifestyle, and your budget. If you’re seeking a longer-lasting, smoother result and are willing to invest the time, effort, and potentially higher cost, a silk press might be the way to go. However, if you’re looking for a quick fix, prefer more versatility in your styling, or are working with a tighter budget, flat ironing could be a suitable option – but it’s crucial to take precautions to minimize heat damage.

Remember, both methods involve the use of heat, which can be damaging to your hair if not done correctly or if your hair is already in a fragile state. Regardless of your choice, it’s crucial to prioritize your hair’s health by using high-quality heat protectants, deep conditioning regularly, trimming split ends, and giving your hair regular breaks from heat styling.

It’s also essential to consider your hair’s texture, density, and overall condition when deciding between a silk press and flat ironing. If your hair is already prone to dryness, breakage, or excessive shedding, the intense heat and tension involved in flat ironing may exacerbate these issues, making the silk press a gentler and potentially safer option.

Additionally, your lifestyle and preferences should play a role in your decision. If you have a busy schedule or an active lifestyle, the maintenance required to preserve a silk press may not be feasible, making flat ironing a more convenient choice. On the other hand, if you prefer low-maintenance styles or have a more sedentary lifestyle, the longer-lasting results of a silk press may be appealing.

Ultimately, the key to maintaining healthy, beautiful hair while enjoying the versatility of both straight and curly styles is to listen to your hair’s needs, be mindful of the potential risks, and incorporate protective measures into your routine. Whether you opt for a silk press or flat ironing, approach the process with caution, patience, and a commitment to nurturing your natural tresses.

It’s also important to consider seeking professional guidance, especially if you’re new to straightening your natural hair. Consulting with a reputable stylist who specializes in natural hair care can provide valuable insights and personalized recommendations based on your unique hair needs.

In conclusion, the choice between a silk press and flat ironing is a personal one that should be guided by your hair’s health, your lifestyle, and your overall hair goals. By understanding the pros and cons of each method and taking the necessary precautions, you can achieve sleek, straight styles while preserving the integrity of your natural tresses.

Posted on Leave a comment

Protecting Natural Hair While Wearing Wigs

Wearing wigs can be a convenient, fun, and stylish way to change up your look, but it’s important to make sure you’re properly caring for your natural hair underneath. Exposing your natural hair to the friction, heat, and moisture changes that come with wearing a wig can lead to a host of issues, including dryness, breakage, and even thinning, if you’re not proactive about protecting it.

In this comprehensive blog post, we’ll explore a variety of tips, strategies, and best practices for keeping your natural hair healthy and thriving while you enjoy the versatility of wigs. Whether you’re a seasoned wig-wearer or just starting to experiment with them, these techniques will help you maintain the integrity of your natural hair and prevent any unwanted damage.


Preparing Your Natural Hair

Before you even put on a wig, it’s crucial to properly prepare your natural hair to create the best foundation for a healthy wig-wearing experience. Start by thoroughly cleansing your hair and scalp to remove any product buildup, dirt, or excess oil that could interfere with the wig’s fit and cause irritation.
Once your hair is clean, it’s time to condition it deeply. Use a rich, moisturizing conditioner or a deep conditioning treatment to strengthen, soften, and hydrate your strands. This will help them better withstand the friction and potential drying effects of wearing a wig.
After conditioning, you’ll want to style your natural hair in a way that will provide a smooth, flat base for the wig to sit on. Braiding, twisting, or banding your hair into a low-maintenance style can help minimize tangles and reduce the risk of breakage. Avoid hairstyles that are bulky or raise the wig too far off your head, as this can cause discomfort and contribute to hair damage.

Choosing the Right Wig Cap

The wig cap you use can make a significant difference in how your natural hair fares under the wig. Look for a wig cap made of a breathable, non-irritating material like lace or satin. Avoid caps that are too tight, as this can restrict blood flow to your scalp and lead to tension, discomfort, and breakage over time.
If you have a delicate or fragile hairline, you may also want to consider using a wig with a lace front. Lace front wigs allow you to blend the wig seamlessly with your natural hairline, minimizing any visible lines or edges that could cause friction and damage.


Maintaining Moisture and Hydration

One of the biggest challenges of wearing wigs is keeping your natural hair properly moisturized. The wig can create a warm, humid environment that can quickly dry out your strands, leading to brittleness, split ends, and other issues.
To combat this, be sure to use a lightweight, leave-in conditioner or serum on your natural hair before putting on the wig. You may also want to apply a light oil, such as argan or coconut oil, to the ends of your hair to seal in moisture and prevent breakage.
Additionally, try to give your hair regular breaks from the wig to allow it to breathe and absorb moisture from the air. Aim to wear the wig for no more than a few days at a time, and take it off at night whenever possible. This will help your natural hair maintain optimal hydration levels and prevent any long-term dryness or damage.


Cleaning and Maintaining the Wig

Proper wig care is also crucial for protecting your natural hair. Be sure to clean your wig regularly, following the manufacturer’s instructions, to remove any built-up oils, products, or dirt that could transfer to your natural hair and cause clogged pores, irritation, or other issues.
When removing the wig, be gentle and avoid pulling or tugging, as this can lead to breakage and damage to your natural strands. Store the wig properly, such as on a wig stand or in a breathable wig box, to keep it in good condition for your next wear.


Scalp Care and Stimulation

In addition to caring for your natural hair, it’s important to pay attention to the health of your scalp while wearing wigs. The warmth and moisture created by the wig can sometimes lead to issues like itchiness, dryness, or even fungal infections if the scalp is not properly cared for.
To keep your scalp happy and healthy, try to gently massage it with your fingertips when removing the wig. You can also use a soothing, non-irritating scalp oil or serum to hydrate and nourish the skin. Additionally, be sure to give your scalp regular breaks from the wig to allow it to breathe and regulate its natural oils.


Wearing wigs can be a fun and versatile way to switch up your look, but it’s essential to take the necessary steps to protect your natural hair in the process. By properly preparing your hair, choosing the right wig cap, maintaining moisture and hydration, caring for the wig itself, and tending to your scalp, you can enjoy the benefits of wigs while keeping your natural hair healthy, strong, and thriving.

Remember, consistency is key when it comes to wig-wearing and natural hair care. Stick to a regular routine, listen to your hair’s needs, and make adjustments as necessary. With a little care and attention, you can rock your wigs with confidence, knowing your natural hair is being well-protected.

Posted on Leave a comment

The Comprehensive Guide to Mastering Wig Care: Synthetic vs. Human Hair

As the world of wigs continues to evolve, more and more individuals are embracing the freedom and versatility that comes with wearing one. Whether you’re seeking a low-maintenance option or a luxurious, natural-looking investment, the wig market offers a wide range of choices to suit your needs and preferences. However, with the variety comes the importance of understanding how to properly care for your wig, ensuring it maintains its beauty and longevity.

In this comprehensive guide, we’ll delve into the intricate world of wig care, exploring the key differences between synthetic and human hair wigs, and providing expert tips and techniques to help you master the art of wig maintenance.

Synthetic Wigs: The Low-Maintenance Marvels


Synthetic wigs have come a long way in recent years, offering a remarkably natural look and feel that can rival their human hair counterparts. Made from synthetic fibers, these wigs are generally more affordable and require less maintenance, making them an attractive choice for those seeking convenience and value. However, neglecting their care can lead to premature wear and an unnatural appearance. Here’s how to keep your synthetic wig looking its best:


1. Gentle Washing: Synthetic wigs should be washed every 6-8 wears or as needed. Use a mild, sulfate-free shampoo formulated specifically for synthetic wigs, and cool water to gently cleanse the fibers. Avoid excessive scrubbing or rubbing, as this can cause frizz and damage the delicate synthetic strands.

2. Conditioning: While synthetic wigs don’t require traditional conditioners, you can use a wig-specific leave-in conditioner or serum to add shine and combat dryness. Avoid heavy, creamy conditioners, as they can weigh down the fibers and cause matting.

3. Styling: One of the benefits of synthetic wigs is their ability to withstand heat styling. However, it’s crucial to use caution and moderation. Always use a thermal protectant spray and limit heat exposure to prevent melting or scorching the fibers. Avoid excessive brushing or combing, as this can cause shedding and tangling.

4. Detangling: When it comes to detangling a synthetic wig, patience is key. Use a wide-tooth comb or a wig brush specifically designed for synthetic fibers, and start from the ends, working your way up to the roots in small sections. Be gentle and take your time to avoid excessive shedding or damaging the fibers.

5. Storage: Proper storage is essential for prolonging the life of your synthetic wig. When not in use, store it on a wig stand or in a breathable wig box. Avoid cramming it into tight spaces, as this can cause permanent creasing and damage to the fibers.


Human Hair Wigs: The Luxurious Investment

Human hair wigs are the epitome of luxury and versatility, offering a remarkably natural look and feel that is unmatched by synthetic alternatives. Made from real human hair, these wigs can be styled and treated just like your own tresses, making them a popular choice for those seeking a seamless, undetectable look. However, this level of luxury and versatility comes with a higher price tag and increased maintenance requirements. Here’s how to keep your human hair wig looking its best:

1. Gentle Cleansing: Human hair wigs should be washed every 7-10 days or as needed, depending on your activity level and product usage. Use a mild, sulfate-free shampoo formulated for human hair and cool water. Gently massage the shampoo into the wig, being careful not to cause excessive tangling or matting.

2. Conditioning: Proper conditioning is crucial for maintaining the health and manageability of human hair wigs. Use a high-quality, moisturizing conditioner and leave it on for several minutes before rinsing. This will help prevent dryness, breakage, and tangles, while keeping the wig soft and manageable.

3. Styling: One of the greatest advantages of human hair wigs is their ability to be styled just like your own hair. You can use heat tools, curlers, and various styling products to create endless looks. However, it’s essential to use caution and always apply a thermal protectant spray to prevent damage from excessive heat exposure.

4. Detangling: Detangling is a crucial step in the care routine for human hair wigs. Use a wide-tooth comb or a wig brush specifically designed for human hair, and start from the ends, working your way up to the roots in small sections. Be patient and gentle to avoid excessive shedding or breakage.

5. Deep Conditioning: To maintain the luster and softness of human hair wigs, regular deep conditioning treatments are recommended. You can use a store-bought deep conditioner or opt for a professional treatment at your local salon or wig boutique.

6. Trimming: Over time, human hair wigs may require occasional trimming to remove split ends and maintain their shape. This can be done at home with sharp scissors or by visiting a professional stylist who specializes in wig care.

7. Maintenance: Depending on the level of wear and styling, human hair wigs may require additional maintenance, such as coloring, highlighting, or corrective treatments. It’s best to consult with a professional stylist who can assess the wig’s condition and recommend the appropriate services.

8. Storage: Proper storage is crucial for preserving the integrity of human hair wigs. Store your wig on a wig stand or in a breathable wig box, away from excessive heat, humidity, or direct sunlight, as these can cause damage, fading, and premature drying.

Embrace the freedom and versatility of wig-wearing with confidence, knowing that you have the knowledge and resources to keep your tresses looking their absolute best.

0